Cross-account Access Creation
The Cado platform can access resources across multiple AWS accounts. For instance, if you manage 100 AWS accounts, you can deploy Cado in a single AWS account and then grant the Cado platform access to all other AWS accounts, enabling the platform to acquire, process, and analyze evidence from all AWS accounts seamlessly. Alternatively, if you use AWS Control Tower, you can deploy using AWS Organizations
Summary
The instructions below outline how to grant permissions for the Cado platform to access a target AWS account (outside of the AWS account in which Cado was deployed). This same process can be repeated for all AWS accounts needing cross-account access.
Setup for cross-account acquisitions within the Cado platform is a 2 step process:
- Create a cross-account IAM Policy and IAM Role in the target AWS account from which you would like the Cado platform to be able to acquire data. This allows the Cado platform to "assume" that cross-account role and perform acquisitions.
- Add the newly created cross-account IAM Role ARN to the Cado platform. This enables the new AWS account within the Cado platform.
Creation of the cross-account IAM Policy and IAM Role within each AWS account can be automated via AWS Stacksets and other programmatic methods. See the Automating AWS IAM Role and Policy Deployment section below for more details.
Adding the cross-account ARN to the Cado platform can be automated via the Cado APIs. See the Automating Cado Cross-account Creation section below for more details.
The examples below reference a primary AWS account which represents the AWS account in which the Cado platform is deployed and running (referred to as AWS account number 111111111111) and a target AWS account which represents the AWS account from which you wish to enable cross-account acquisitions from (referred to as AWS account number 222222222222) .
STEP 1: Create IAM Policy and IAM Role in Target AWS Account
-
In the target AWS account (the account from which you would like to acquire data from), navigate to IAM > Policies and click Create Policy. In the Permissions Wizard, attach or paste the Cado Cross-account Policy located here, then click Next. Give the Policy a name (like
CadoResponseCrossAccountPolicy), then click Create Policy. -
After the Cado Cross-account Policy is created, navigate to IAM > Roles and click Create Role. Under "Select type of trusted entity", click Another AWS Account and enter the account ID of your primary account (the account in which the Cado platform is deployed and running.
111111111111in this example).
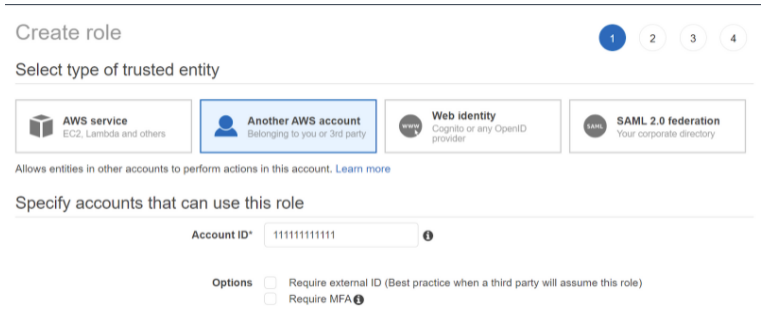
- Add the policy you recently created in the steps above, then click Next give the Role a name. The role name must include the text
CadoResponse(case sensitive, likeCadoResponseCrossAccountRole). If the secondary account role name does not contain the textCadoResponse, cross-account acquisition will not work properly.
The Cado Cross-account Policy includes permissions to acquire a variety of AWS resources. You can remove permissions that are not needed for your use case.
- The EC2 permissions are required are acquire EC2 systems.
- The KMS permissions are required to acquire KMS encrypted volumes.
- The SSM permissions are required for Triage captures.
- The S3 Permissions are required to import from S3 buckets in other accounts.
- The CloudTrail permissions are required to import CloudTrail logs in other accounts.
- The ECS permissions are required to import ECS containers in other accounts.
- The EC2 de-register permission is required to import AMI images cross-account.
Also note that if you choose to change Maximum session duration, the minimum currently supported by Cado is 1 hour.
Lastly, the above steps walk through how to create a new role; however, if you already have an IAM Role with appropriate EC2 access, you can instead edit the trust relationship to include the below AWS Principal (replacing the 111111111111 account number with your own primary AWS account, in which the Cado platform is deployed).
The below JSON is only required if you choose to use an existing role and you didn't create a new role as recommended earlier.
{
   "Version": "2012-10-17",
   "Statement": [
       {
           "Effect": "Allow",
           "Principal": {
               "AWS": "111111111111"
           },
           "Action": "sts:AssumeRole",
           "Condition": {}
       }
   ]
}
You may choose to limit this further and trust only your specific Cado role rather than the entire primary account. See AWS JSON policy elements: Principal - AWS Identity and Access Management for more information.
STEP 2: Add Target AWS Role ARN to the Cado Platform
After the target AWS Role is set up in the target AWS account (222222222222), you will need to add the Role ARN to the Cado platform. To do this, log into your Cado platform, navigate to Settings > Cloud and click on the Create Role button. When prompted, enter the IAM Role ARN created in Step 1 and provide an Account Alias (Cloud ID) for the role. The Alias is what will appear in the Cado platform UI, so we typically recommended that it includes the AWS account number in the text.
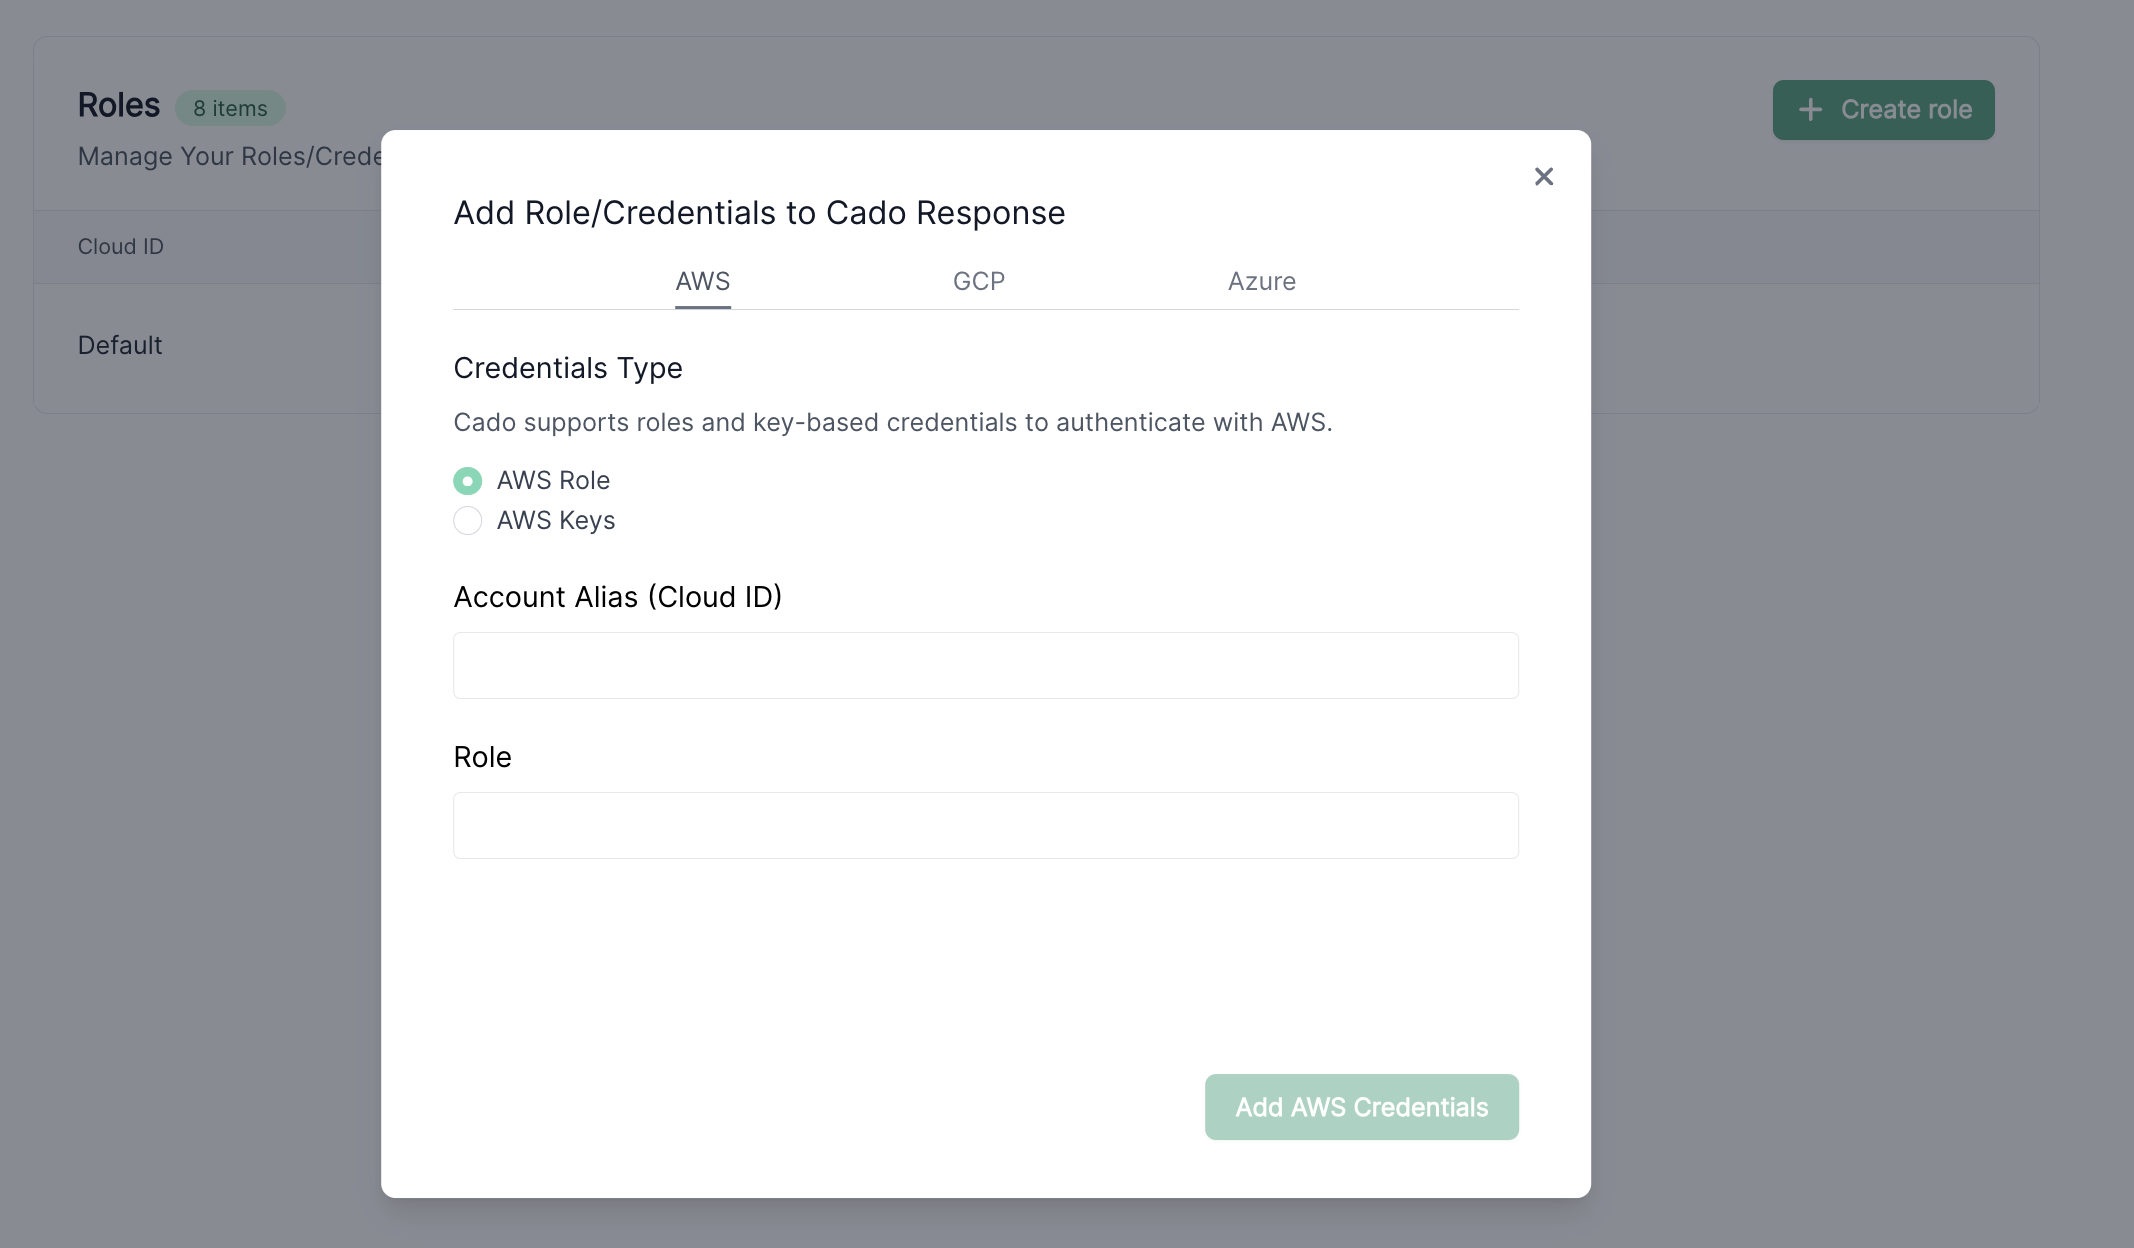
Upon submission, the Cado platform will attempt to validate the role, ensuring it is assumable. Once validated, you will see the Alias in the list of available AWS accounts.
Automating AWS IAM Role and Policy Deployment
Using CloudFormation StackSets
To automate the creation of the IAM Policy and Role in each target AWS Account via CloudFormation StackSets across your AWS Organisation, you can follow the steps below. More details about CloudFormation StackSets can be found here: Working with AWS CloudFormation StackSets
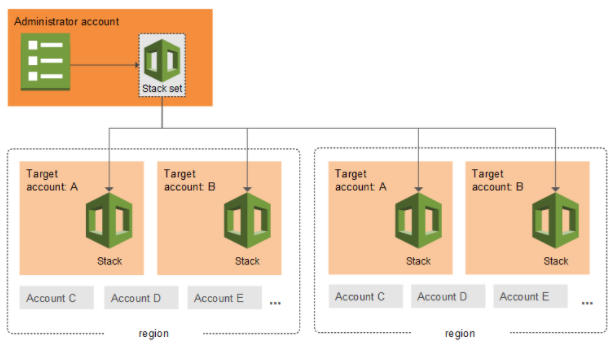
- Go to "StackSets" from your master StackSet account that is enabled to deploy into other accounts.

-
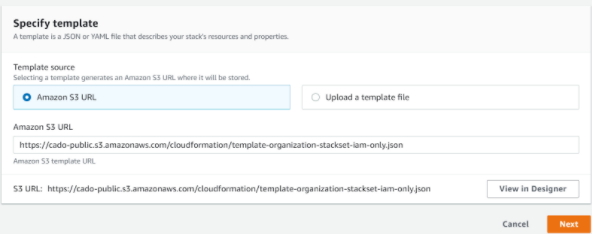
Click Create StackSet
-
Enter the S3 URL as https://cado-public.s3.amazonaws.com/cloudformation/template-organization-stackset-iam-only.json then click Next:
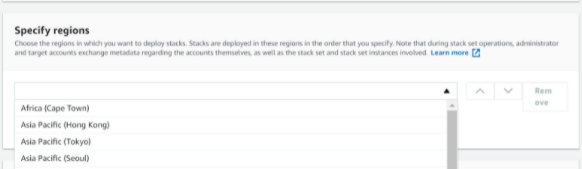
- Click Next through the next two dialogues, and under "Create StackSet" select any region (this works as IAM is global):
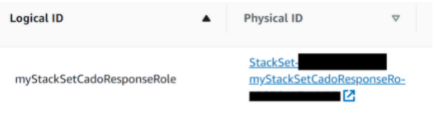
- Once deployed, this will then create a IAM Policy and IAM Role in each target AWS account, that you can view in IAM:
Automating Cado Cross-account Creation
As mentioned previously, the second step to adding cross-account access is to add the newly created cross-account IAM Role ARN to the Cado platform. This enables the new AWS account within the Cado platform. To automate this process via the Cado APIs, please see the example Cado API for adding AWS credentials here.
Key Based Credentials
You can add Key Based credentials, for temporary just-in-time cross-cloud access to the Cado platform. This can be done at Settings > Cloud Accounts > Add Accounts > AWS Keys.