Azure Cross Subscription Creation
Setting up an app registration for cross tenancy/subcription acquisitions
To leverage cross Azure acquisitions, you need to create an Azure app registration in the Azure tenancy you want to acquire resources from. Follow the contents of this guide, and select the option for Accounts in any organizational directory (Any Azure AD directory - Multitenant). 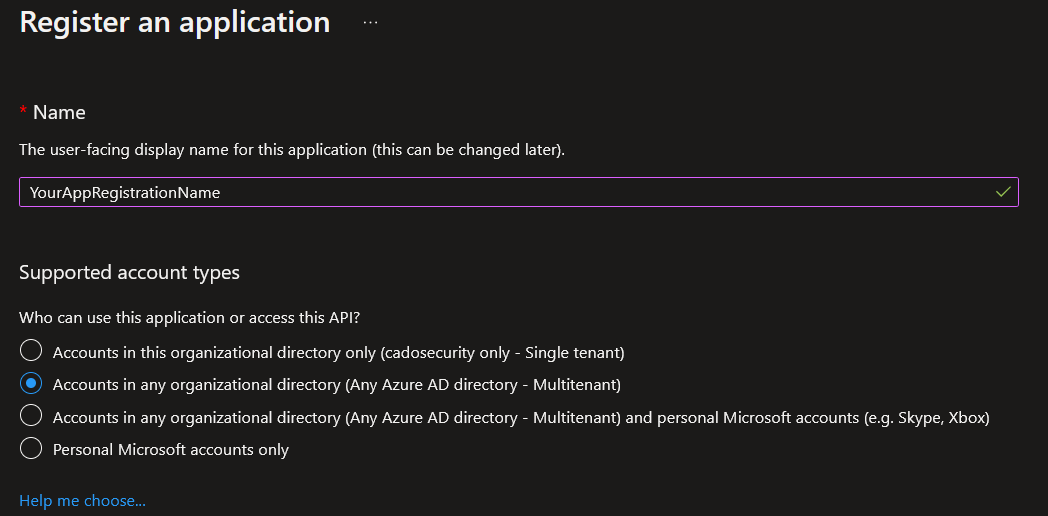
If you are only importing from a seperate subscription within the same tenancy as your Cado deployment, you can use Accounts in this organizational directory only as your app registration account type.
You can then generate a client secret associated with this app registration using this guide, be sure to keep a note of it as you will need it to register the app with the Cado platform. 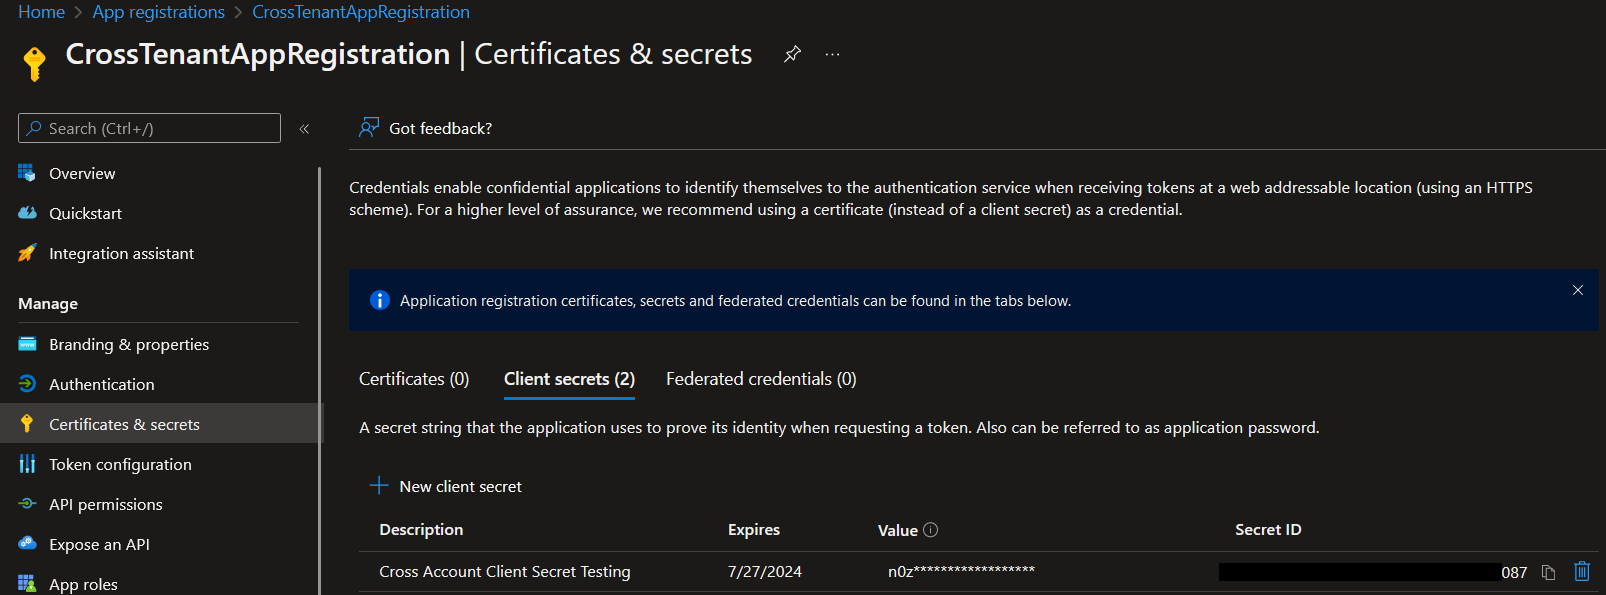 By default, when you create an app registration, Azure will also create an enterprise application alongside it with the same name.
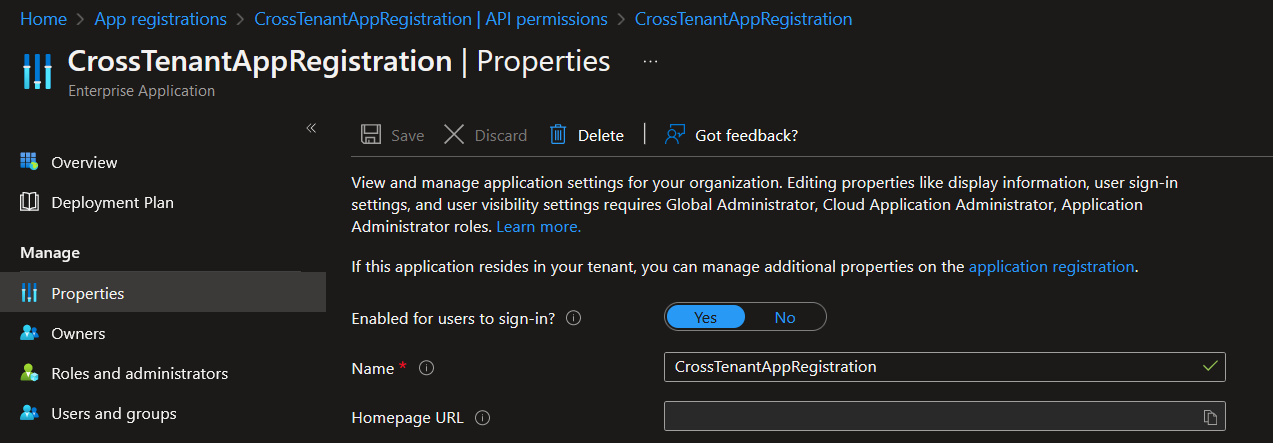
Navigate to this in Microsoft Entra, and under the properties sidebar, allow the option for
By default, when you create an app registration, Azure will also create an enterprise application alongside it with the same name.
Navigate to this in Microsoft Entra, and under the properties sidebar, allow the option for Enabled for users to sign-in. Without enabling this option, cross tenancy/subscrition acquisitions will not work.
Required role-asignments
Once you have created your app registration, you will need to give it the required Azure role-assignments to allow it to access your Azure resources.
- Go to the Azure management group you want to acquire from, this could be within the same, or a different Azure tenancy.
- Select your management group and go to the Access control (IAM) permissions for it.
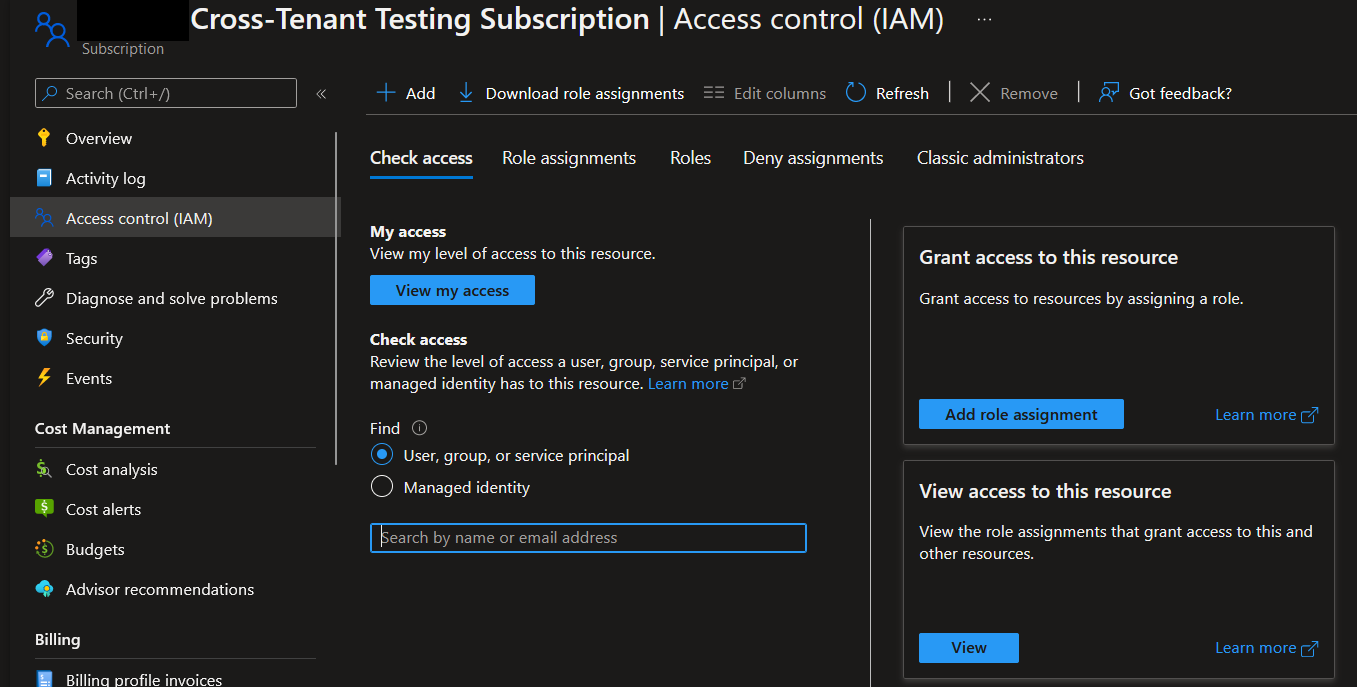
- Select
Add role assignmentand add the following role-assignments for your app registration: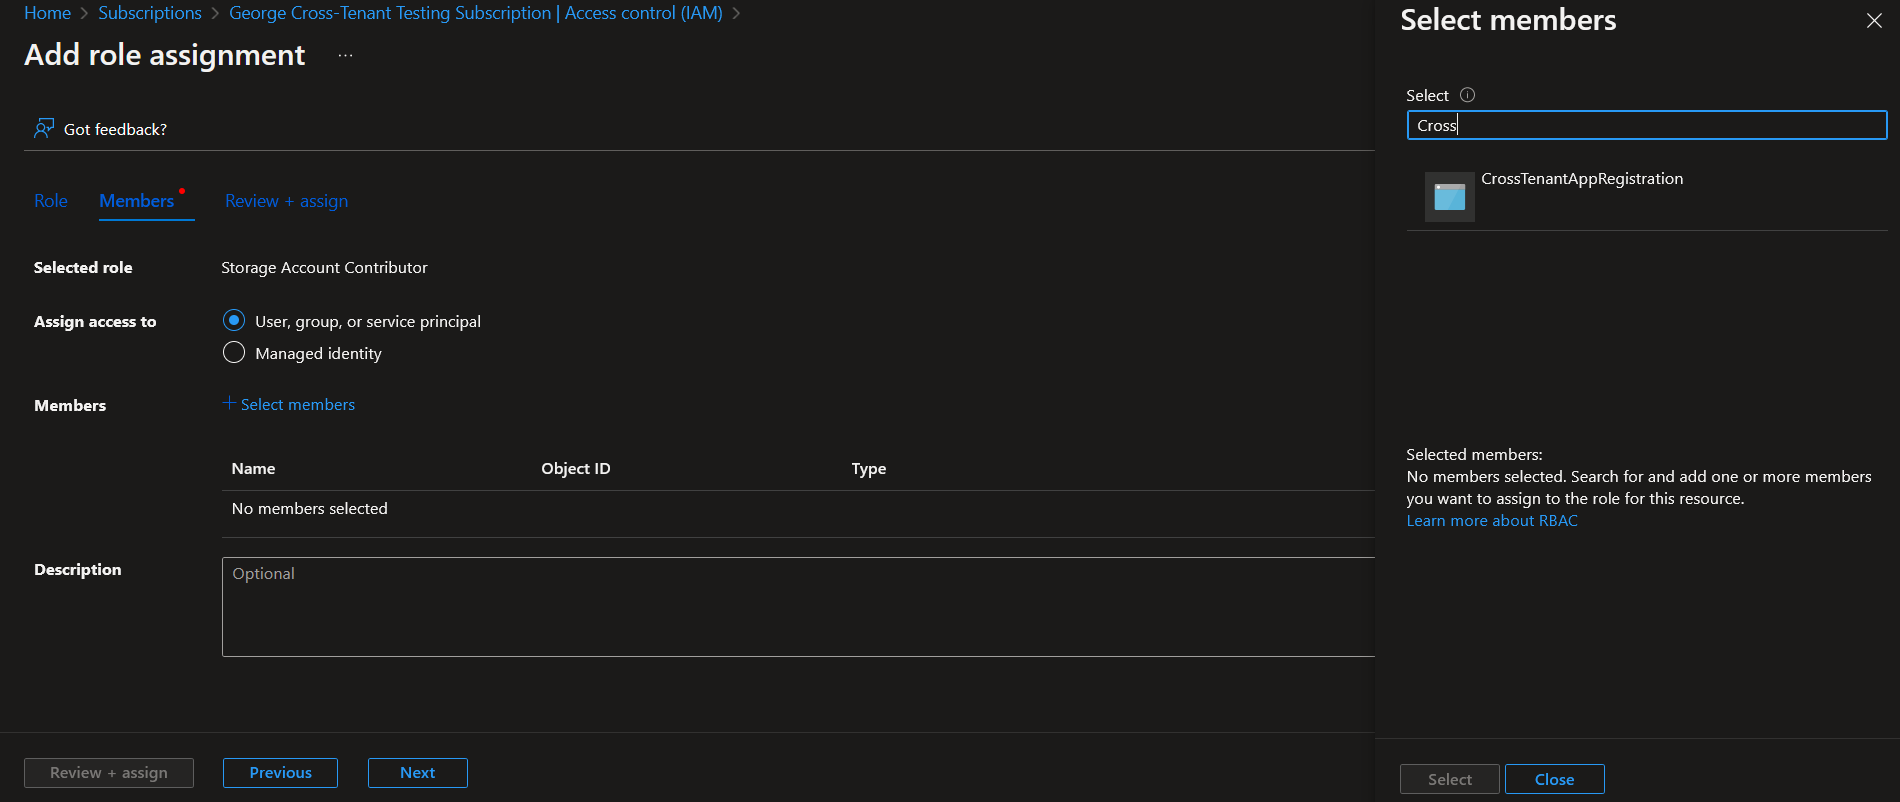
Storage Account Contributor.Disk Snapshot Contributor.Virtual Machine Contributor.Monitoring Contributor.Azure Kubernetes Service Cluster Admin Role.
Search for your app registration name under the Select members prompt.
With these credentials in place, you are able to register the app with Cado.
Registering credentials within Cado
Once you have created the app registration, you will be able to register the credentials within Cado using the following steps:
- Navigate to the to the settings page and choose the
Cloudoption. - Select the Azure tab and click
Add Azure Credentials.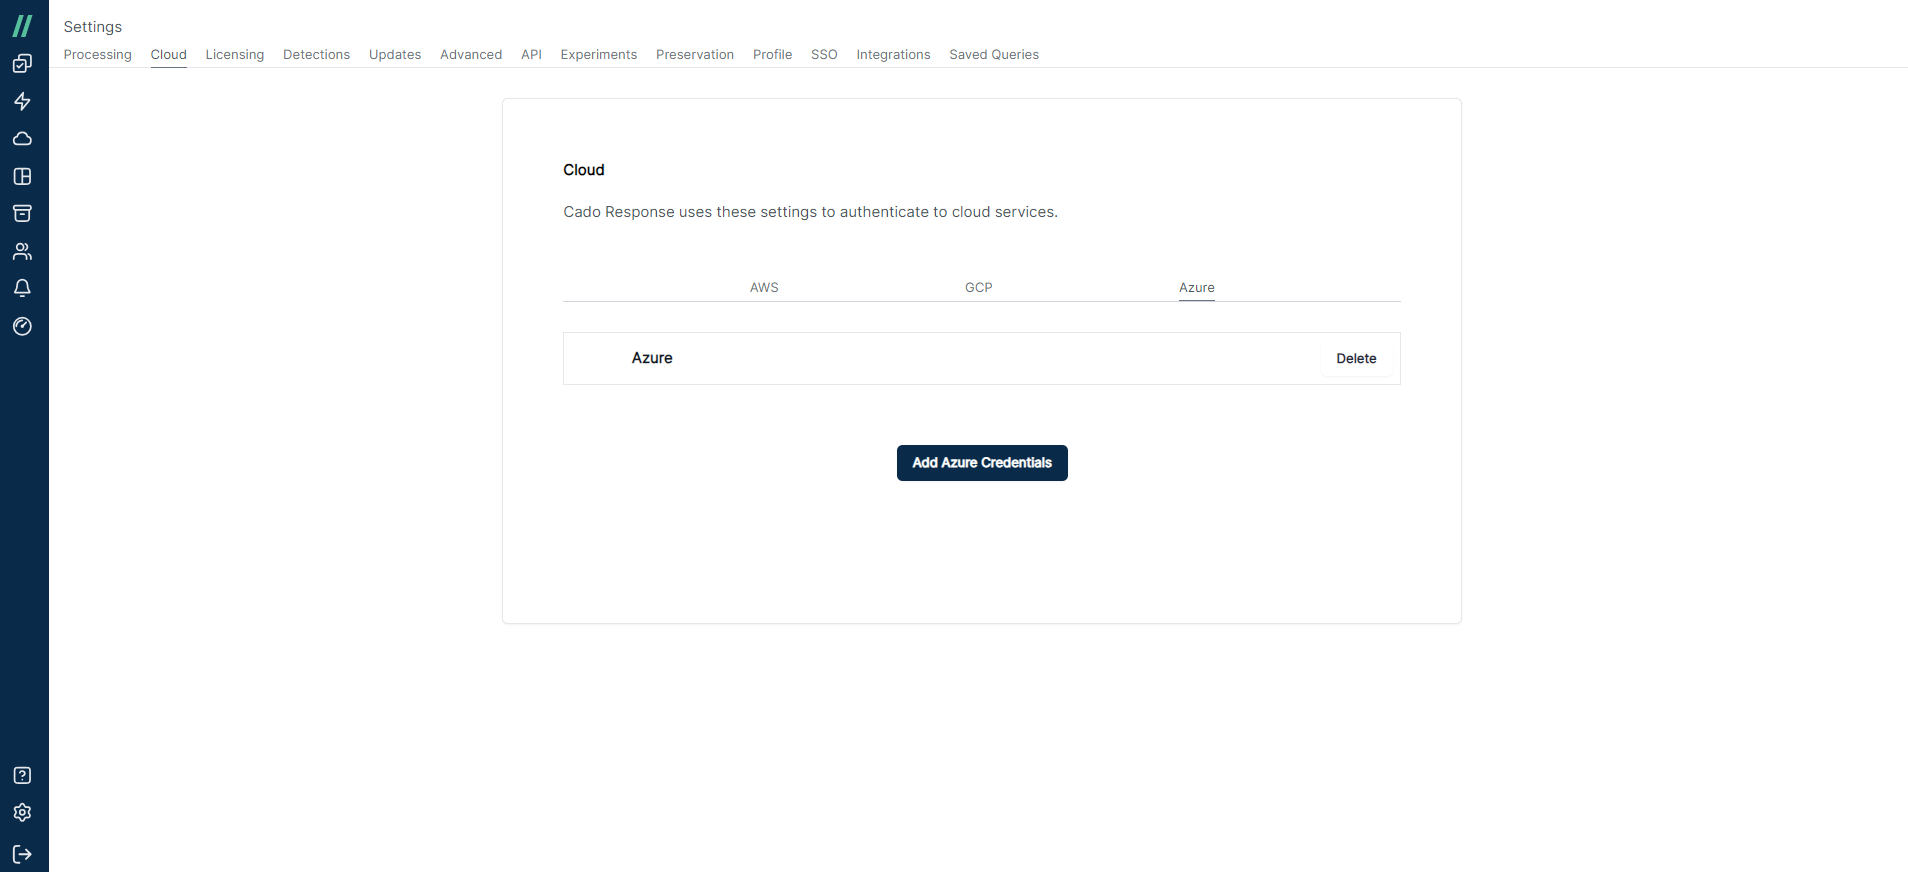
- Using the information generated during the the app registration setup, fill-in the required fields with the appropriate information and click
Submit. Use the subscription ID you assigned app-registration permissions for.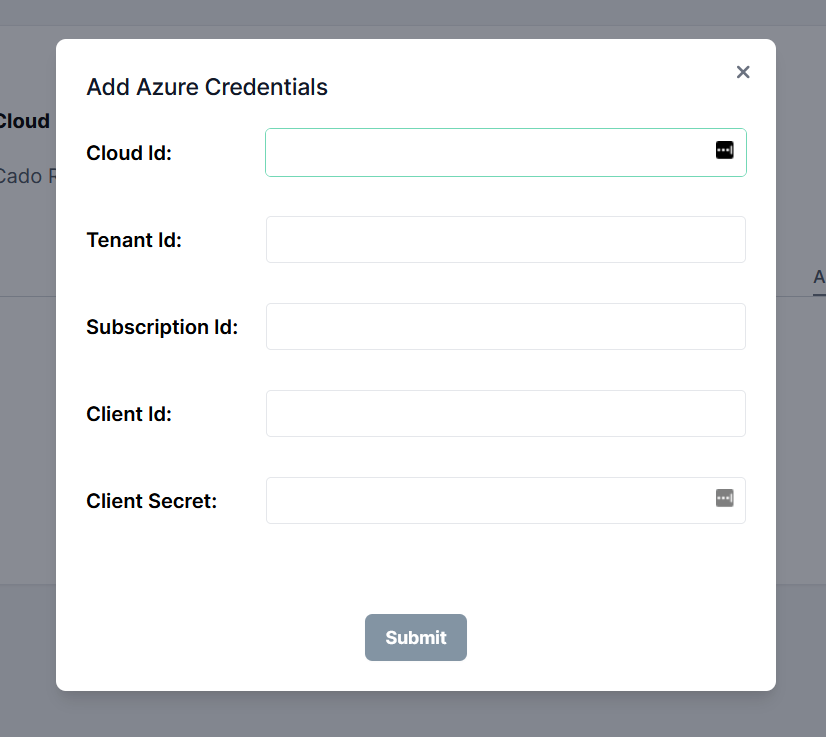
Cloud ID is only used to assign a name to the added credentials, it can be any memorable name of your choosing.
Some of the information you will need is on the Azure app registration page, shown below: 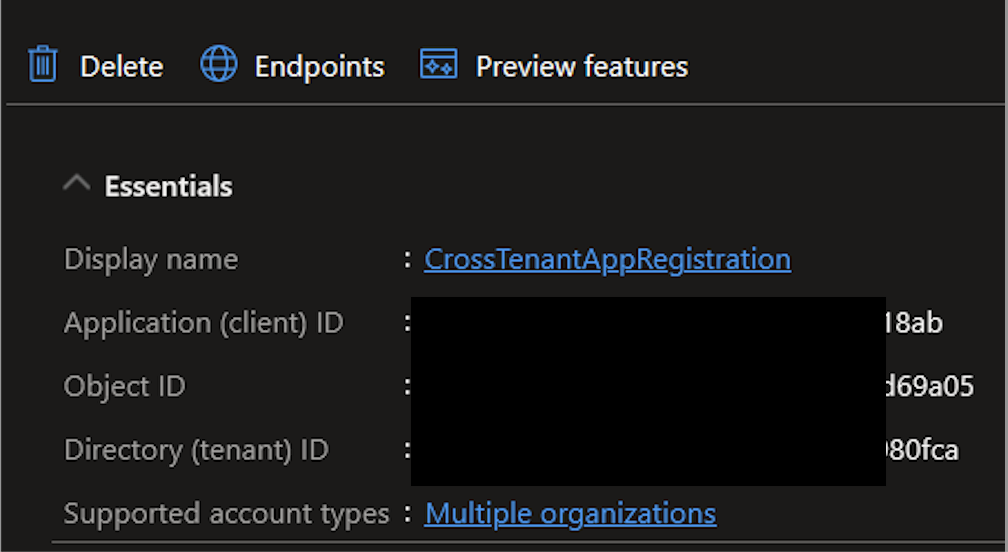
Set the Cloud ID as a name you will recognize, e.g. "AzureCrossAccount". You can find the Tenant ID under Azure Active Directory. The Subscription ID is on the Overview Tab of your Subscription. The Client ID is the Client ID of the application, found on the Properties tab of the Enterprise Application you created earlier. The Client Secret is from the the first step above.
The credentials are now ready to use within Cado. Go to an Azure import and select the credential you wish to use from the dropdown in the top left of the import page. 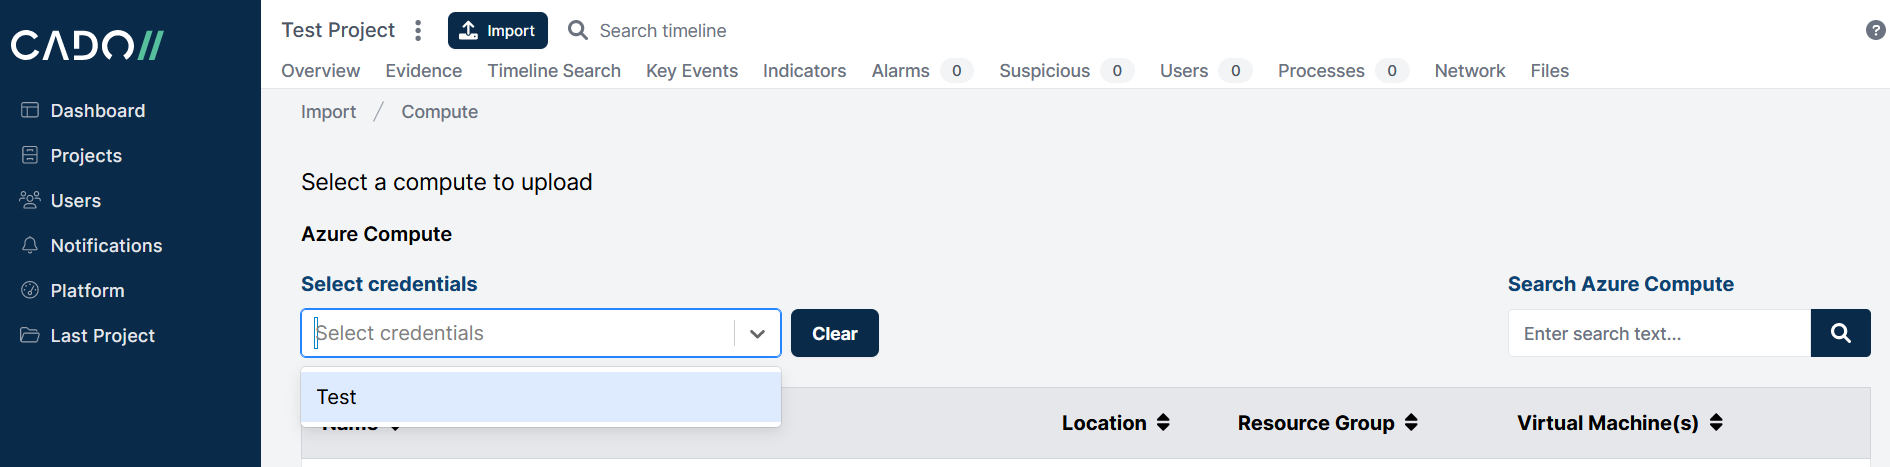 You are now able to import resources managed by other tenants and or subscriptions as normal.
If you encounter an error when attempting to acquire a resource across Azure accounts or subscriptions, verify that a typo has not been made during addition, or if the wrong information has been entered in the wrong field.