This section is not relevant to SaaS deployments - Please see AAISP documentation on SSO.
How to Set Up the Azure AD OAuth Integration
You can enable the beta version of Azure AD OAuth Integration in Cado by navigating to Settings > SSO > Microsoft OAuth.
Setting Up Azure AD SSO
- Open the Azure portal and go to Enterprise Applications.
- Click New Application.
- Select Create your own application:
- Enter a name (e.g., / Forensic Acquisition and Investigation).
- Choose Integrate any other application you don't find in the gallery (Non-gallery).
- Make a note of the Application ID.
Optional: Create a role to allow Azure AD users to be assigned admin privileges:
-
From the home page, go to Azure Active Directory and select the App Registrations blade.
-
Select your application (you may need to switch to the All Applications tab if you're not the owner).
-
Go to App roles and click Create app role.
-
Define a role value (e.g.,
admin), but you can name this role as you prefer. Make a note of the role name for later use.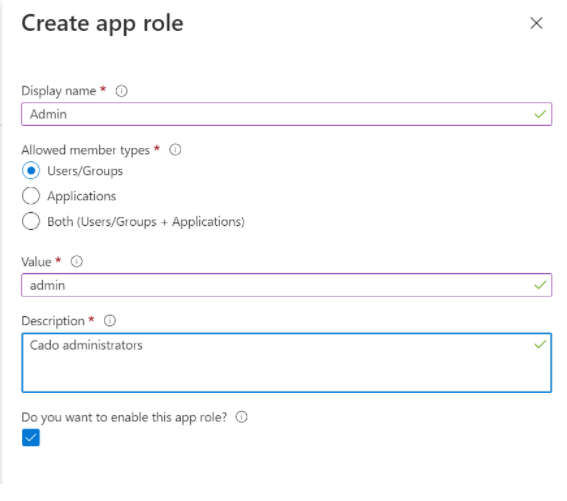
-
Configure Access Control:
- Go to Enterprise Applications and open the Properties blade. Ensure that User assignment required? is set to
Yes, meaning only assigned users can log in to / Forensic Acquisition and Investigation.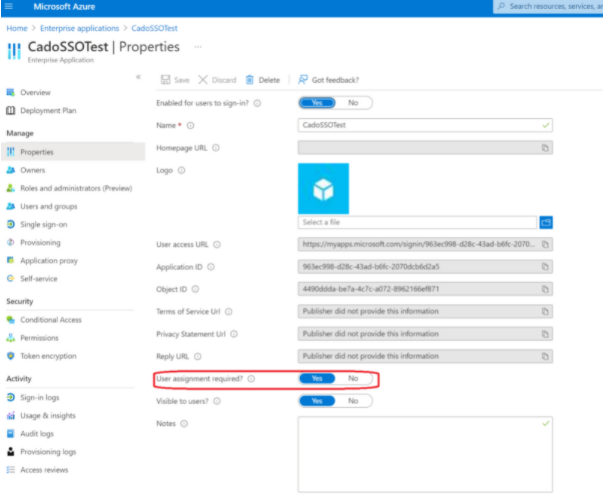
- Navigate to Users and Groups.
- Click Add User/Group to assign users who will have access to the application. If you created an admin role, you can assign users to this role to give them admin access within / Forensic Acquisition and Investigation.
- Go to Enterprise Applications and open the Properties blade. Ensure that User assignment required? is set to
-
Create a Client Secret:
- From the home page, go to Azure Active Directory and select the App Registrations blade.
- Select your application (you may need to switch to the All Applications tab if you're not the owner).
- Go to the Certificates & Secrets blade and click New Client Secret.
- Make a note of the Value; you will need this in / Forensic Acquisition and Investigation.
-
Collect Required Information:
- In the Overview blade, note down the following values:
Application (Client) IDDirectory (Tenant) IDClient Secret(from the previous step).
- In the Overview blade, note down the following values:
-
Whitelist the Redirect URL:
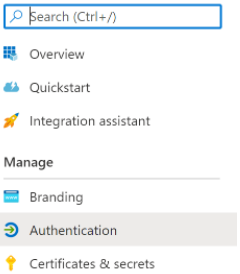
- Go to the Authentication blade.
- Click Add a Platform.
- Select Web and input your redirect URL. This should be the URL you use to access / Forensic Acquisition and Investigation in your browser, including the
/loginpath. Example:https://my.cado.instance/login.
- Go to the Authentication blade.
-
Add API Permissions:
- Go to the API Permissions blade.
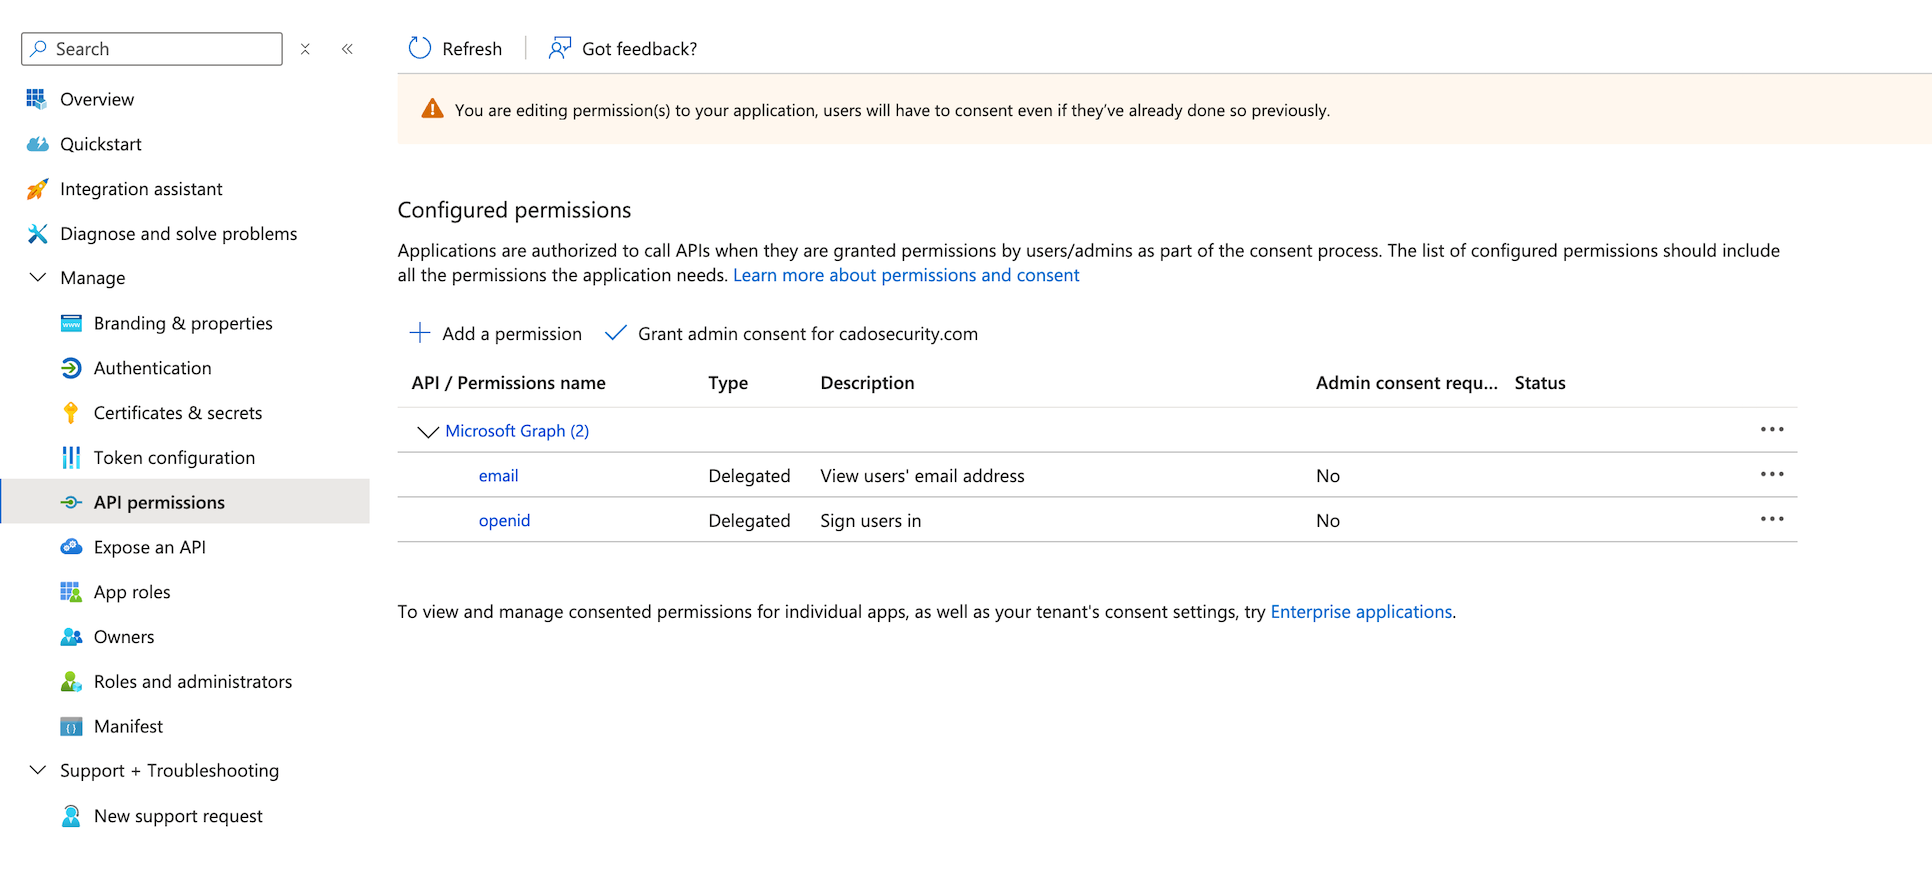
- Click Add a permission.
- Select Microsoft Graph.
- Choose Delegated Permissions.
- Under OpenId permissions, select email and openid.
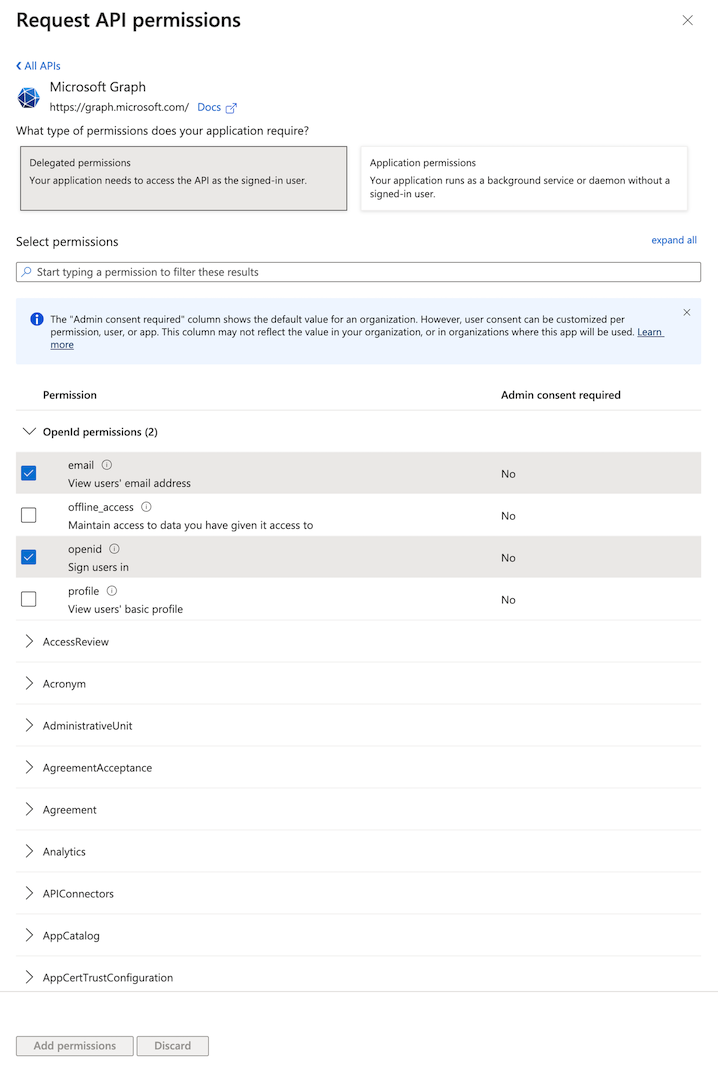
- Click Add permissions.
- Go to the API Permissions blade.
-
Configure SSO in the / Forensic Acquisition and Investigation Platform:
- Log in to your / Forensic Acquisition and Investigation instance as an admin user.
- Go to Settings > SSO > Microsoft OAuth.
- Enter the Microsoft OAuth details you noted earlier.
- In the
Admin Group Namefield, enter the value you configured in Step 4.
Use Admin Group Name to configure the role (Administrator or Analyst) for first login only. Any changes to a users roles from then onwards should be managed in the platform.
- Click Update.