How to Integrate with Platforms Using Webhooks
Webhook integrations enable you to automatically send information from the / Forensic Acquisition and Investigation platform to other applications using a unique URL.
Before You Begin
To set up a webhook integration in / Forensic Acquisition and Investigation, you first need to generate a webhook URL from the application you wish to integrate with. Most applications that can receive POST requests are supported.
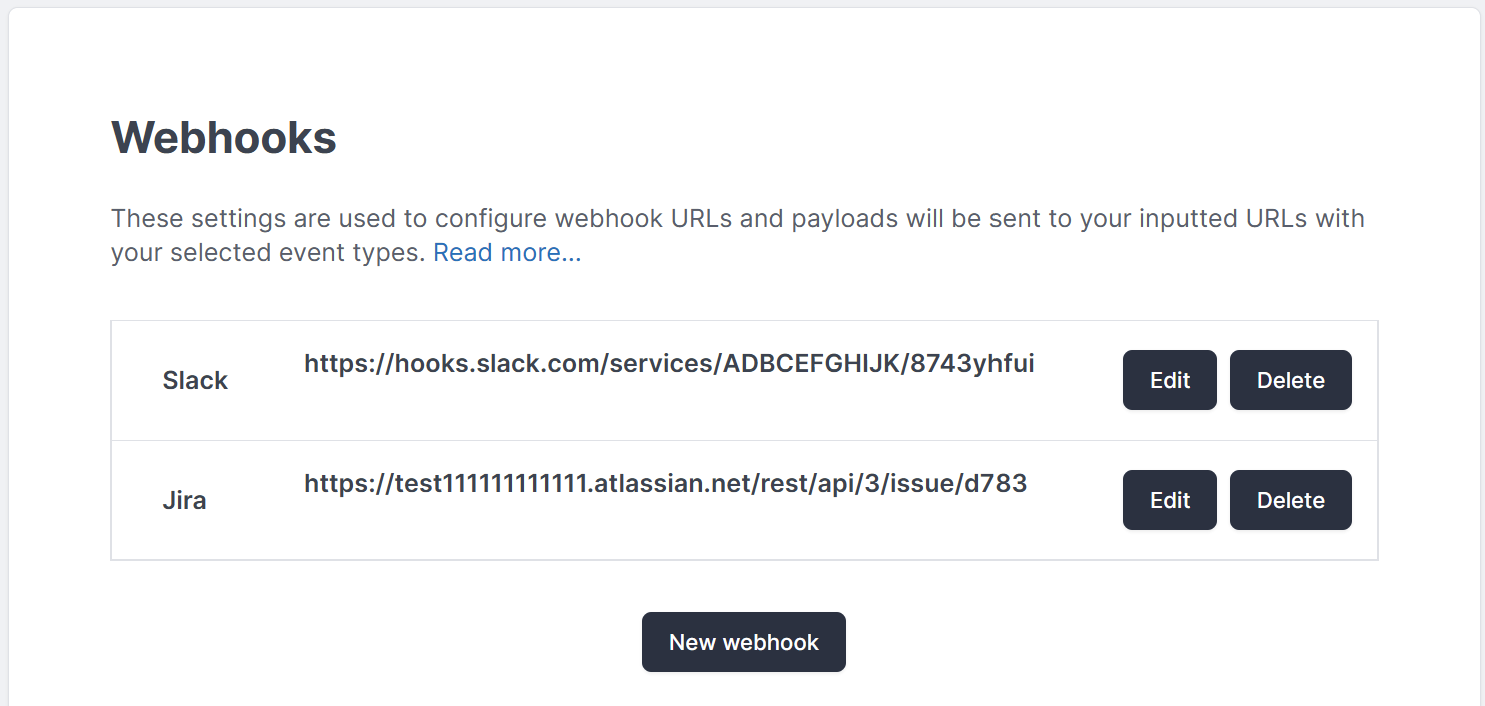
To manage your webhooks, navigate to Settings > Integrations > Webhooks.
Adding or Modifying a Webhook
Adding a New Webhook
- Click the New Webhook button at the bottom of the settings page.
- Fill out the following details in the form:
- Name: A descriptive name for the webhook.
- URL: The webhook URL generated by the application you are integrating with.
- Events to Send: Choose the types of events you want to send to the webhook URL. / Forensic Acquisition and Investigation supports the following events:
- High Severity Alarm
- Suspicious Severity Event
- Processing with Alarms
- Processing Finished
- Processing Failed
- Admin Login
- Audit Events (Create, Update, Delete, Login, Logout, Download, Reboot, Upgrade)
- Detection (Created, Updated)
- Detection Group (Created, Updated)
- Payload: This is a JSON object that defines how the webhook URL will receive the data (see more details in the Custom Payloads section).
- Event Formatting: Choose the format for sending the
$Eventdata. Options include:- Default: Sends the raw event as a string with details of the event.
- Slack: Only the
$Titleis sent, e.g., "HIGH SEVERITY ALARM DETECTED." - Jira: Only supported for Detection events. Formats the event with markdown to include metadata about the detection.

Modifying an Existing Webhook
To modify a webhook, click the Edit button next to the webhook you wish to change. Any new events will be sent to the updated URL or modified payload.
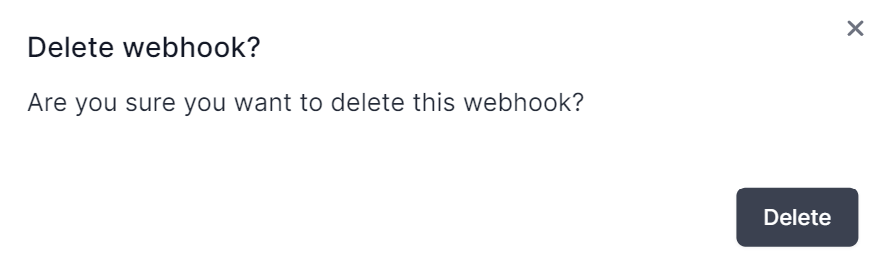
Deleting a Webhook
To delete a webhook, click the Delete button next to the webhook you want to remove. Once deleted, no further events will be sent to that URL.
Custom Payloads
When creating a webhook, you must specify a payload, which defines how the webhook URL receives data from / Forensic Acquisition and Investigation. The payload must be a valid JSON object and include both $Title and $Event values. These values tell / Forensic Acquisition and Investigation where to insert the data about the event.
Check the documentation of the application you are integrating with to ensure the payload format is correct. If the payload doesn't match the expected format, the event might not be received.
Example of a Valid Payload
{
    "title": "$Title",
    "message": "$Event"
}
Slack Integration
You can send notifications to a Slack channel using webhooks.
-
Follow the Slack documentation to create an incoming webhook for Slack, then copy the webhook URL.
-
In / Forensic Acquisition and Investigation, navigate to Settings > Integrations > Webhooks and select New Webhook.
-
Enter a name for your webhook and paste the Slack webhook URL. Check the "High Severity Alarms" option under events to send.
-
Set up the payload in / Forensic Acquisition and Investigation to include
$Titleand$Event, and format it as required by Slack:{
"text": "*$Title*\nDetails: $Event"
}
For more details on Slack message payloads, see Slack messaging documentation and Slack message formatting with Markdown.
Teams Integration
You can send notifications to a Microsoft Teams channel using webhooks.
-
Follow the Microsoft Teams documentation to create an incoming webhook, then copy the webhook URL.
-
In / Forensic Acquisition and Investigation, go to Settings > Integrations > Webhooks and select New Webhook.
-
Name your webhook and paste the Teams webhook URL. Check the "High Severity Alarms" event.
-
Set the payload format to include
$Titleand$Event, with a JSON key oftext:{
"text": "**$Title** \nDetails: $Event"
}
Refer to the Teams message payload documentation and Teams Markdown formatting for more details.
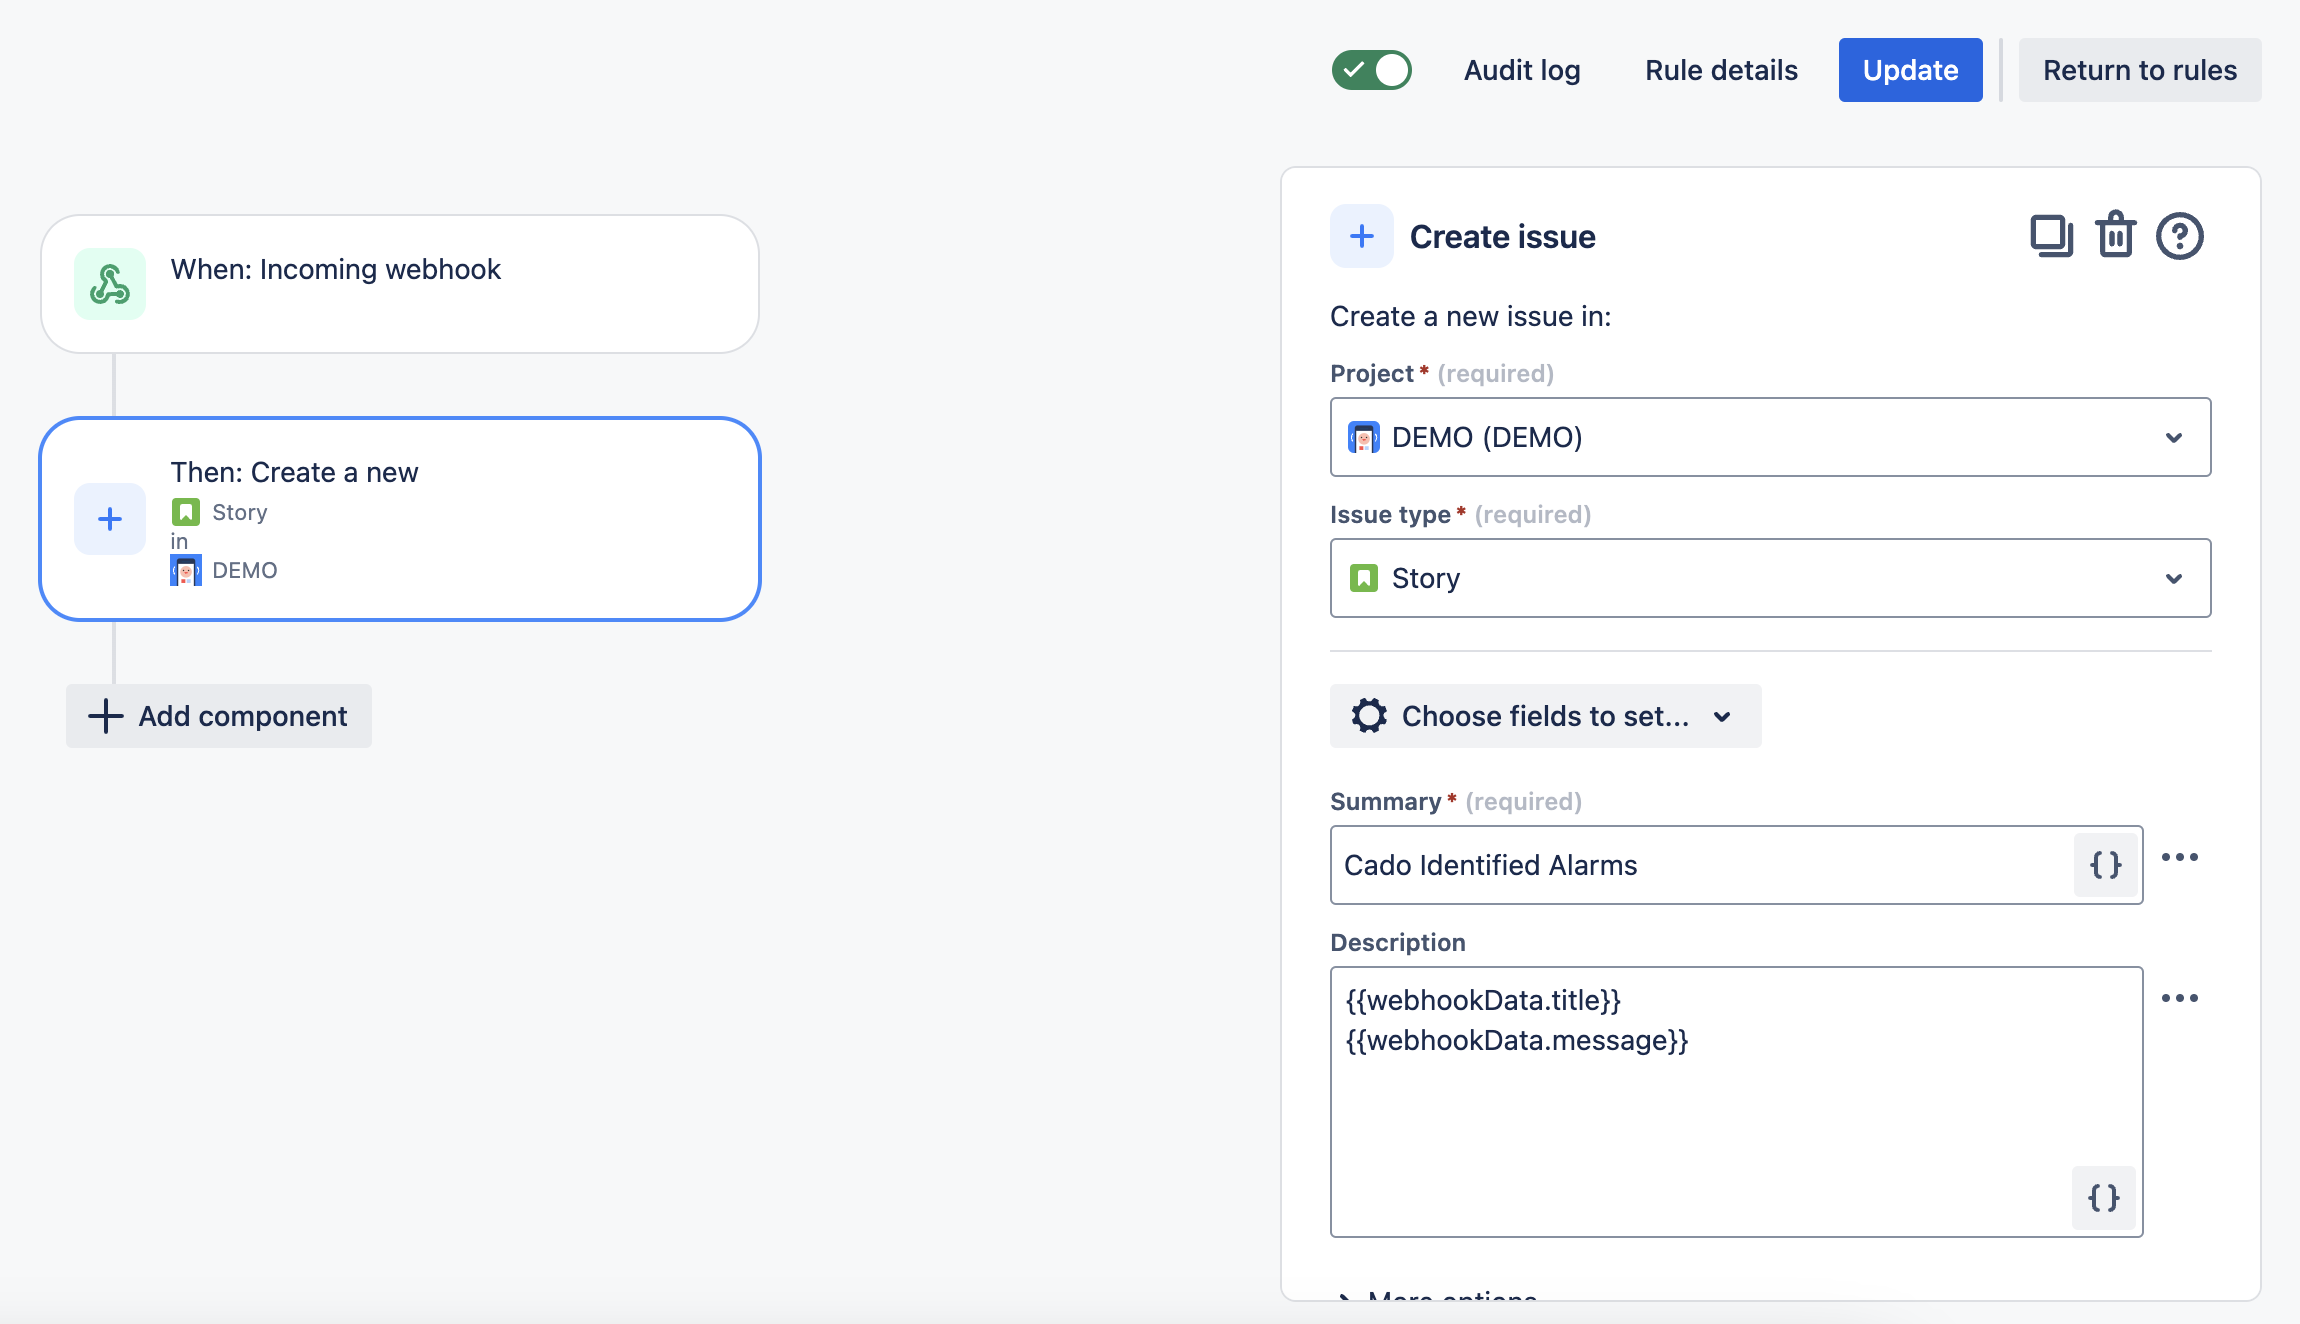
Jira Integration
You can create Jira tickets using / Forensic Acquisition and Investigation webhooks.
-
Follow the Jira documentation to create an incoming webhook in Jira.
-
Create a new webhook by selecting Project settings > Automations > Create a Rule > Incoming Webhook.
-
Choose "Then, Create a New Ticket" and use the following description:
{{webhookData.title}}
{{webhookData.message}} -
In / Forensic Acquisition and Investigation, go to Settings > Integrations > Webhooks, and add a new webhook with the Jira webhook URL. Select the "High Severity Alarms" event as an example.
More complex webhooks are available to the Detection webhooks, for example this can be set as the "Custom Payload" in / Forensic Acquisition and Investigation for the "Detection Updated" webhook:
{
  "detection_id": "$detection_id",
  "event_type": "$event_type",
  "group_id": "$group_id",
  "message": "$Event",
  "title": "$Title"
}
And correspondingly in Jira:
Summary:
[{{webhookData.event_type}}] - {{webhookData.title}}
Description:
{{webhookData.message}}
Additional fields:
{
    "update": {
        "labels": [
            {
                "set": ["Cado_Group_{{webhookData.group_id}}"]
            }
        ]
    }
}
ServiceNow Integration
To integrate with ServiceNow:
- Follow the ServiceNow documentation to create incoming webhooks.
- Create the webhook in the ServiceNow project, similar to the steps outlined for Jira.