How to deploy with Cloudformation
Quick Start
To quickly deploy the platform via AWS CloudFormation with default options, click here.
AWS CloudFormation Template Overview
Deploying / Forensic Acquisition and Investigation in AWS is simple using our CloudFormation Template (CFT), which walks you through configuring the platform stack.
If you're working with the Sales team or using a free trial, you will receive a link to the CloudFormation Template to begin deployment. If you haven't received it yet, contact sales@cadosecurity.com.
Available CloudFormation Templates
Several CloudFormation templates are available, depending on your deployment requirements:
- DeployCloudFormationPublic.yaml: Creates an EC2 instance with an IAM role. This template deploys with a public IP address for direct access.
- DeployCloudFormationPrivate.yaml: Deploys an EC2 instance behind a load balancer without a public IP. Access is via the ALB.
- DeployCloudFormationCustomVPC.yaml: Deploys into an existing VPC. Use DeployCloudFormationCustomVPCNetworking.yaml for creating the necessary networking within this VPC.
- DeployCloudFormationGovCloud.yaml: For deploying into AWS GovCloud. Like the private template, it includes a load balancer and no public IP.
Steps for Deployment
-
After receiving the CloudFormation template link, click it to open the AWS CloudFormation Management Console.
-
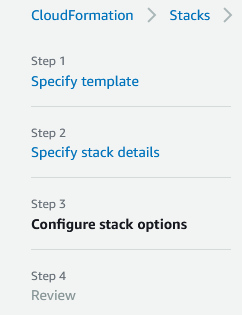
In Step 1 (Specify template), leave the default settings (Template is ready and Amazon S3 URL) unchanged. Click Next.
-
In Step 2 (Specify stack details), name your stack (e.g.,
CadoResponse) and enter the following parameters:Parameters Overview:
Parameter Name Value Description Instance type for / Forensic Acquisition and Investigation EC2 Server m5.4xlargeRecommended minimum instance size for enterprise use. Key pair for / Forensic Acquisition and Investigation EC2 Server (choose your keypair) Used for SSH access. Not required for standard use, but useful for support if needed. Allowed source IP for SSH (enter IP range) Specify IP addresses or ranges for SSH access (CIDR format). Follow the least privilege principle. Allowed source IP for HTTPS (enter IP range) Specify IP addresses or ranges for HTTPS access (CIDR format). VPC CIDR (enter IP range) Define the CIDR block for the VPC Subnet. EFSArchive AFTER_30_DAYSMove data to infrequent access storage after 30 days. InstanceVolumeSize 1000Specify required EC2 volume size in GB. S3ArchiveTime 30Move S3 data to Glacier after 30 days of inactivity. S3GlacierDelete 365Delete Glacier storage data after 365 days. AvailabilityZoneA (choose your AZ) The primary subnet's availability zone. AvailabilityZoneB (choose your AZ) The secondary subnet's availability zone. FeatureFlagPlatformUpgrade TrueEnables automatic platform upgrades. CertificateARN (enter ARN) The ARN of the certificate for the Application Load Balancer (if FeatureFlagDeployWithALB is True).Proxy (URL format) Optional proxy URL for outbound connections. ProxyCertUrl (URL) Optional URL to download the proxy certificate. tipWe recommend setting InstanceVolumeSize to at least 500GB. The instance should be sized to about 20% of the data you plan to store. For example, for 5TB of data, allocate 1000GB of disk space. You can delete old investigations to free up space.
-
Click Next.
-
In Step 3 (Configure stack options), unless you need custom settings, click Next. For custom settings, contact / Forensic Acquisition and Investigation.
 info
infoFor more information on stack options, refer to the AWS Documentation.
-
Review your configuration and click Create Stack.
infoEnsure to check the box for "I acknowledge that AWS CloudFormation might create IAM resources" if an IAM role was not applied in Step 3. The IAM policy created by the CloudFormation template follows the principle of least privilege, restricting access to only the necessary resources and actions.
Deployment Time
Deployment takes approximately 15 minutes, with an additional 10 minutes for the stack to complete installation and updates.
Once the stack status shows CREATE_COMPLETE, the deployment is finished, and you can log into / Forensic Acquisition and Investigation.
After deployment, you can import test data from the "Help" menu to verify that everything is functioning correctly.