Simple Deployment Guide
This guide provides step-by-step instructions for deploying a / Forensic Acquisition and Investigation instance from the Azure console, aimed at helping you get up and running with the platform as quickly as possible
The initial deployment offers a basic working environment; however, certain functionalities are not included. Refer to the ‘Extensions’ section for details on missing features and instructions on how to add them.
Initial Deployment
Prerequisites
Before starting, make sure you have all the following:
- A resource group (exclusively for Cado), with the following resources:
- A storage account
- A blob container in the storage account above
- A network security group configured to allow inbound traffic from your IP. At the very least, it will need to allow HTTPS, although SSH may also be useful.
- Either A “User Assigned Managed Identity” named
cado-identityor A "Service Principal", with the Role assignmentContributorscoped to this resource group.
You can add a role assignment to a managed identity by following these steps:
-
Navigate to the “User Assigned Managed Identity” resource.
-
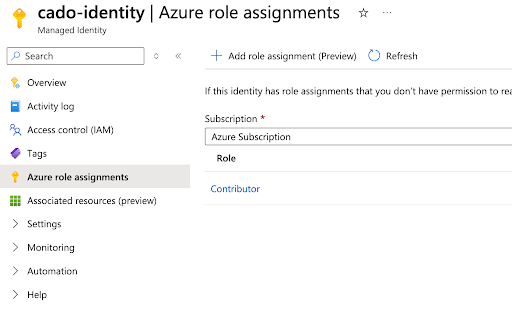
Select “Azure role assignments” on the sidebar.

- Click Add role assignments (preview)
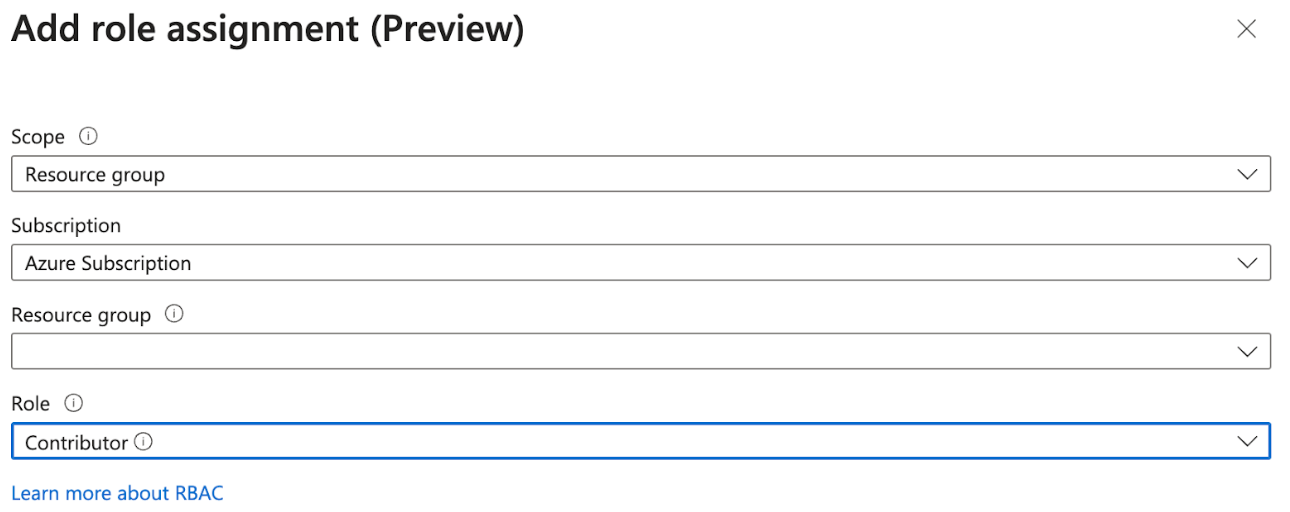
- Fill in the form, selecting the Resource group you are deployed into and the Contributor role, then press Save
Instructions
- Open the “Community Images” service in Azure.Then, filter the images by the / Forensic Acquisition and Investigation public gallery name (CadoPlatform-1a38e0c7-afa4-4e0d-9c56-433a12cd67b1) to list all the / Forensic Acquisition and Investigation images available for deployment.

- Select an image in the location you want to deploy in. The supported regions are
- East US
- East US 2
- Central US
- North Central US
- South Central US
- West US
- West US 2
- West US 3
- West Central US
Once an image has been selected, select a version to deploy (the latest version is recommended) and press Create VM.

- Override the following settings on each page of the creation wizard:
Overview
- Resource group -> your resource group name

- Name -> Choose a name for your VM
- Size -> At least D4S_v3 (recommended for production: D16ds_v4)

- Administrator account username -> adminuser
- SSH public key source -> A key you have access to, or generate a new key.
- Public inbound ports -> None
- Licensing -> Other
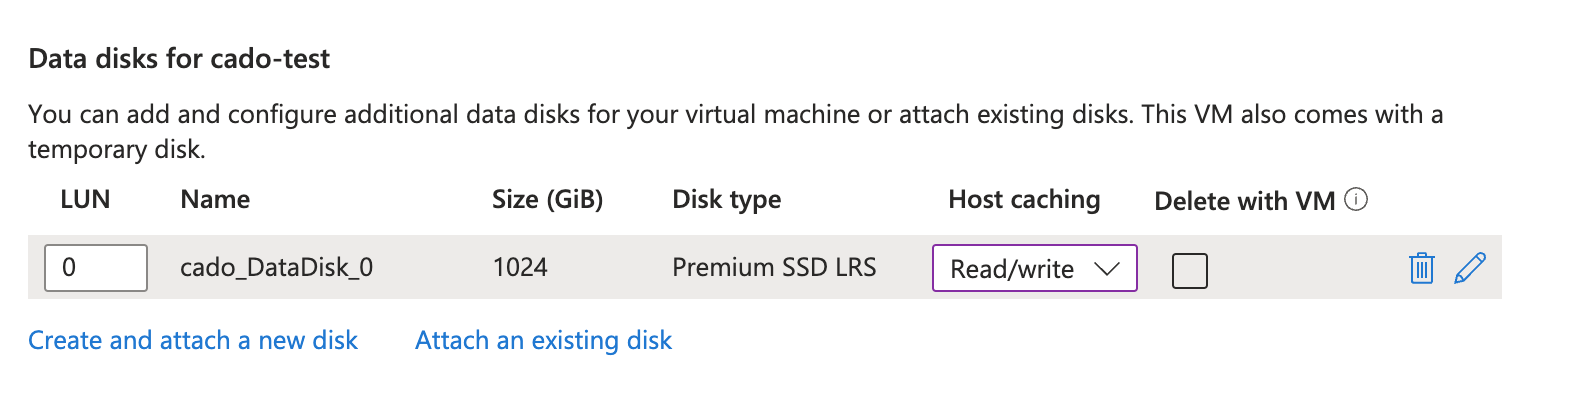
Disk
- 1024GB size recommended, with Read / Write host caching.
- Make sure delete with VM is unticked.
The options should look as below:
Networking
- Ensure “Delete public IP and NIC when VM is deleted” is unticked
Advanced
- Enable user data -> True
- User data -> The following script, replacing
<STORAGE_ACCOUNT_NAME>and<BLOB_STORE_NAME>with your Storage account / blob container name respectively.
#!/bin/bash -x
echo "[FIRST_RUN]" > /home/admin/processor/first_run.cfg
echo azure_storage_account = <STORAGE_ACCOUNT_NAME> | sudo tee -a /home/admin/processor/first_run.cfg
echo "bucket = <BLOB_STORE_NAME>" >> /home/admin/processor/first_run.cfg
Additionally, if using a service principal, the following extra lines need to be added to the user data.
echo -n "<CLIENT_ID>" | sudo tee -a /home/admin/processor/envars/AZURE_CLIENT_ID
echo -n "<TENANT_ID>" | sudo tee -a /home/admin/processor/envars/AZURE_TENANT_ID
echo -n "<CLIENT_SECRET>" | sudo tee -a /home/admin/processor/envars/AZURE_CLIENT_SECRET
-
After all these settings are configured, review and create the virtual machine.
-
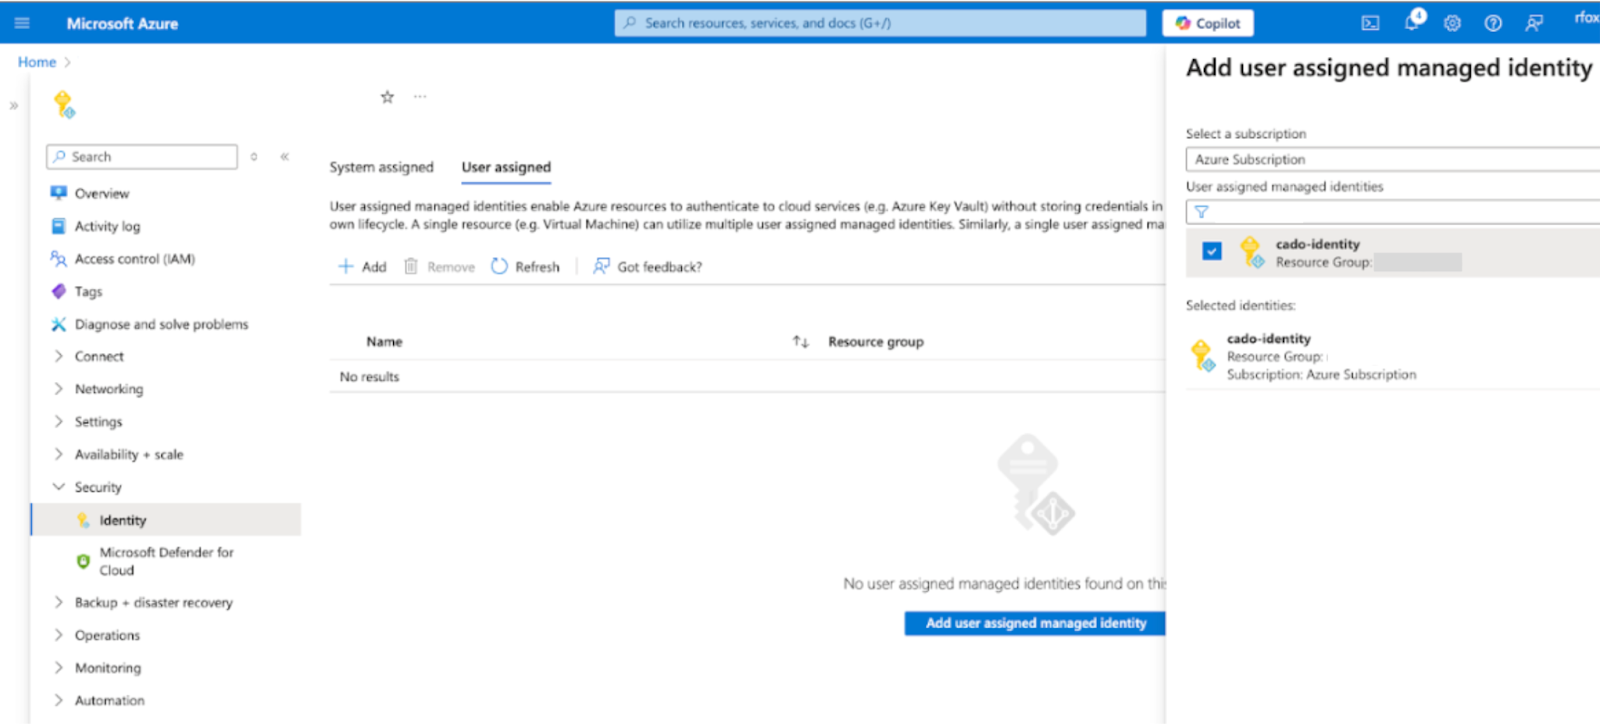
If you are using a managed identity: Once your virtual machine has been created, assign the user managed identity to it in the UI.
This can be done on the Security -> Identity pane of the VM on the “User assigned” tab.
- The network security group created earlier needs to be associated with the subnet the virtual machine resides in. This can be done once the VM is running from the Overview section, and selecting Network Settings > Create Port Rule > Inbound Port Rule.
The default password for the VM is the Resource ID of the virtual machine.
Optional Extensions
Workers
The initial deployment uses a single Compute instance, limiting imports to / Forensic Acquisition and Investigation Host captures and restricting simultaneous evidence processing to ensure stability. Additional Compute instances are required to process more data or multiple evidence items concurrently.
To enable Workers follow the workers document - Enable Workers
Secret Manager
The initial deployment stores the key used to encrypt secrets in / Forensic Acquisition and Investigation locally on the machine. Enabling a Secret Manager allows Cado to instead store the key in Azure Key Vault.
To enable Secret Manager follow the secret manager document - Enable Secret Manager
NFS
The initial deployment deployment deploys without a Network File Share (NFS). Enabling an NFS allows Cado to keep a copy of every file processed on disk. This enables the re-running of analysis and the downloading of the original file in the UI for further analysis.
To enable NFS follow the NFS document - Enable NFS