How to manually add a cross-account role to / Forensic Acquisition and Investigation
There are two main steps to set up cross-account acquisitions:
- Create a Cross-Account IAM Policy and Role in the target AWS account from which the platform will acquire data. This allows / Forensic Acquisition and Investigation to assume the cross-account role for data acquisition.
- Add the Cross-Account IAM Role ARN to the platform to enable access to that AWS account.
This page describes step 2. For step 1, see Manually deploy a cross-account IAM role in AWS.
info
Throughout this guide:
- The primary AWS account is where / Forensic Acquisition and Investigation is deployed (referred to as account
111111111111). - The target AWS account is where cross-account access is being set up (referred to as account
222222222222).
Step 2: Add the Target AWS Role ARN to the Platform
Once the cross-account role is created in the target AWS account (222222222222), add the Role ARN to the platform:
- Log into the / Forensic Acquisition and Investigation platform and go to Settings > Accounts and click Create an account.
- Select AWS from the set of providers.
- The AWS Role option should already be selected.
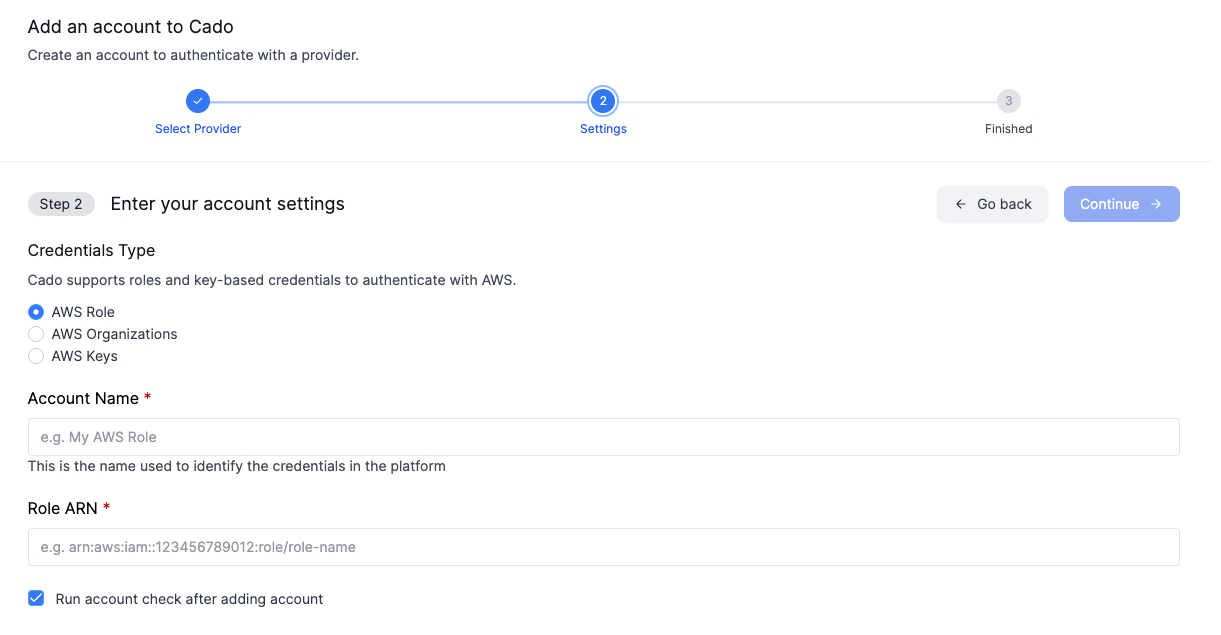
- Enter the IAM Role ARN created in Step 1, and provide an Account Name. The Account Name should include the AWS account number for clarity.
- The / Forensic Acquisition and Investigation platform will validate the role to ensure it is assumable. Once validated, the account name will appear in the list of available AWS accounts.
- By default, / Forensic Acquisition and Investigation will perform an Account Check to confirm the required permissions are in place for successful acquisitions. You can skip this by unchecking the "Run account check after adding account" option. For more information, refer to the Account Check guide.
Adding the cross-account ARN to / Forensic Acquisition and Investigation can also be automated using / Forensic Acquisition and Investigation API. See Automating Cado Cross-Account Creation.