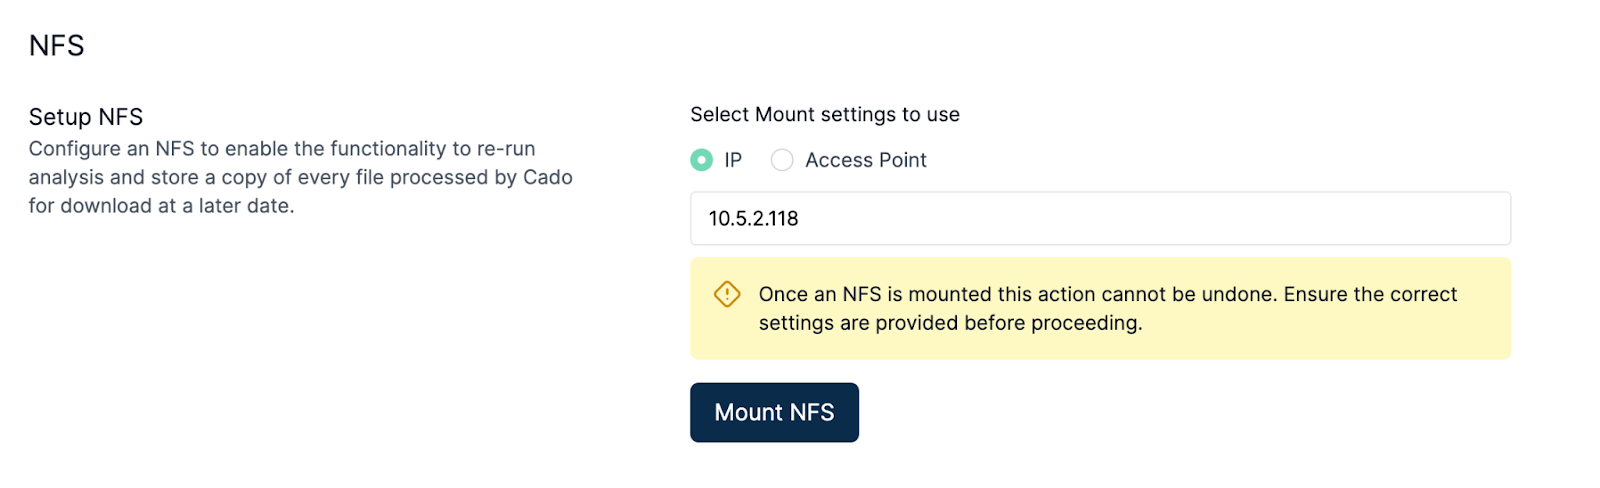
NFS
The initial simple deployment deploys without a Network File Share (NFS). Enabling an NFS allows Darktrace to keep a copy of every file processed on disk. This enables the re-running of analysis and the downloading of the original file in the UI for further analysis.
Prerequisites
- The VPC and subnet you used in the initial deployment
- The security group you used in the initial deployment, and permission to edit it
Steps
- Configure inbound Security Group rules. Use security group id as Custom Source
| Type | Port | Source | Reason |
|---|---|---|---|
| Custom TCP | 2049 | Custom - Your / Forensic Acquisition and Investigation security group | Communicating with NFS |
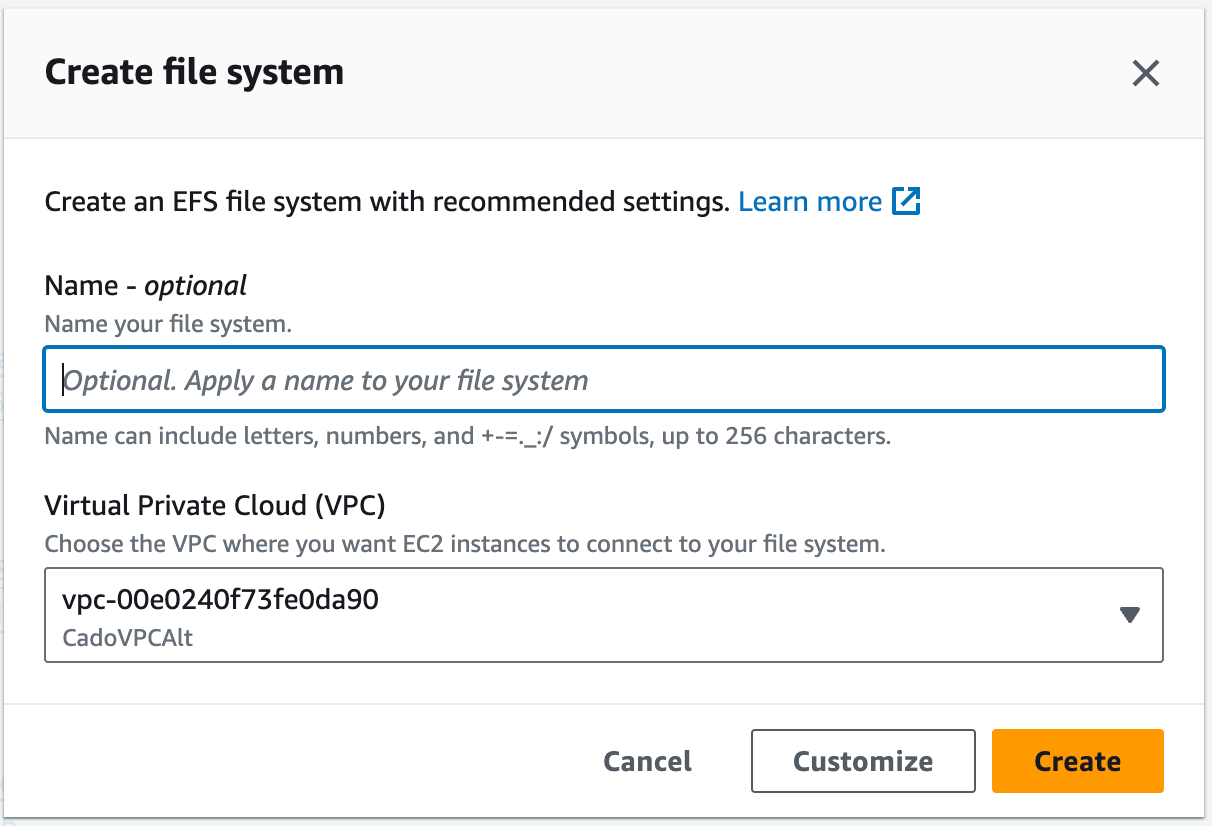
- Navigate to the EFS page in AWS Console
- Click “Create file system”
- Select your VPC from step 1, then press “Customize”.
-
Leave defaults unchanged for General, Performance settings and Tags. Click Next.
-
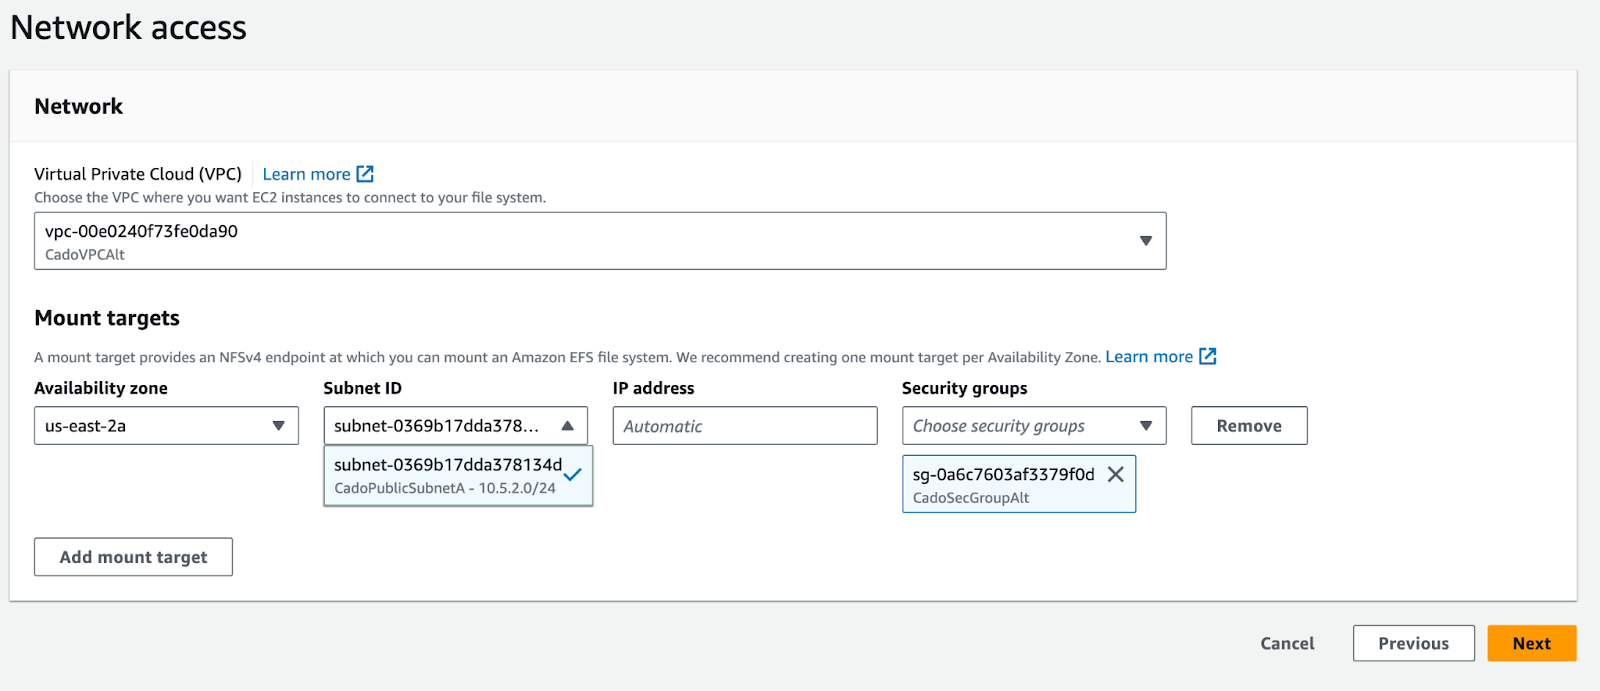
On the Network Access page
a. Under Virtual Private Cloud (VPC): Select the VPC where your instance is deployed.
b. Under mount targets: Create a mount target using the subnet and security group your instance is deployed with
- Leave the File system policy settings unchanged. Click Next.
- On the Review and Create page: click "Create"
- On the last page, confirm the settings are correct, then press “Create”.
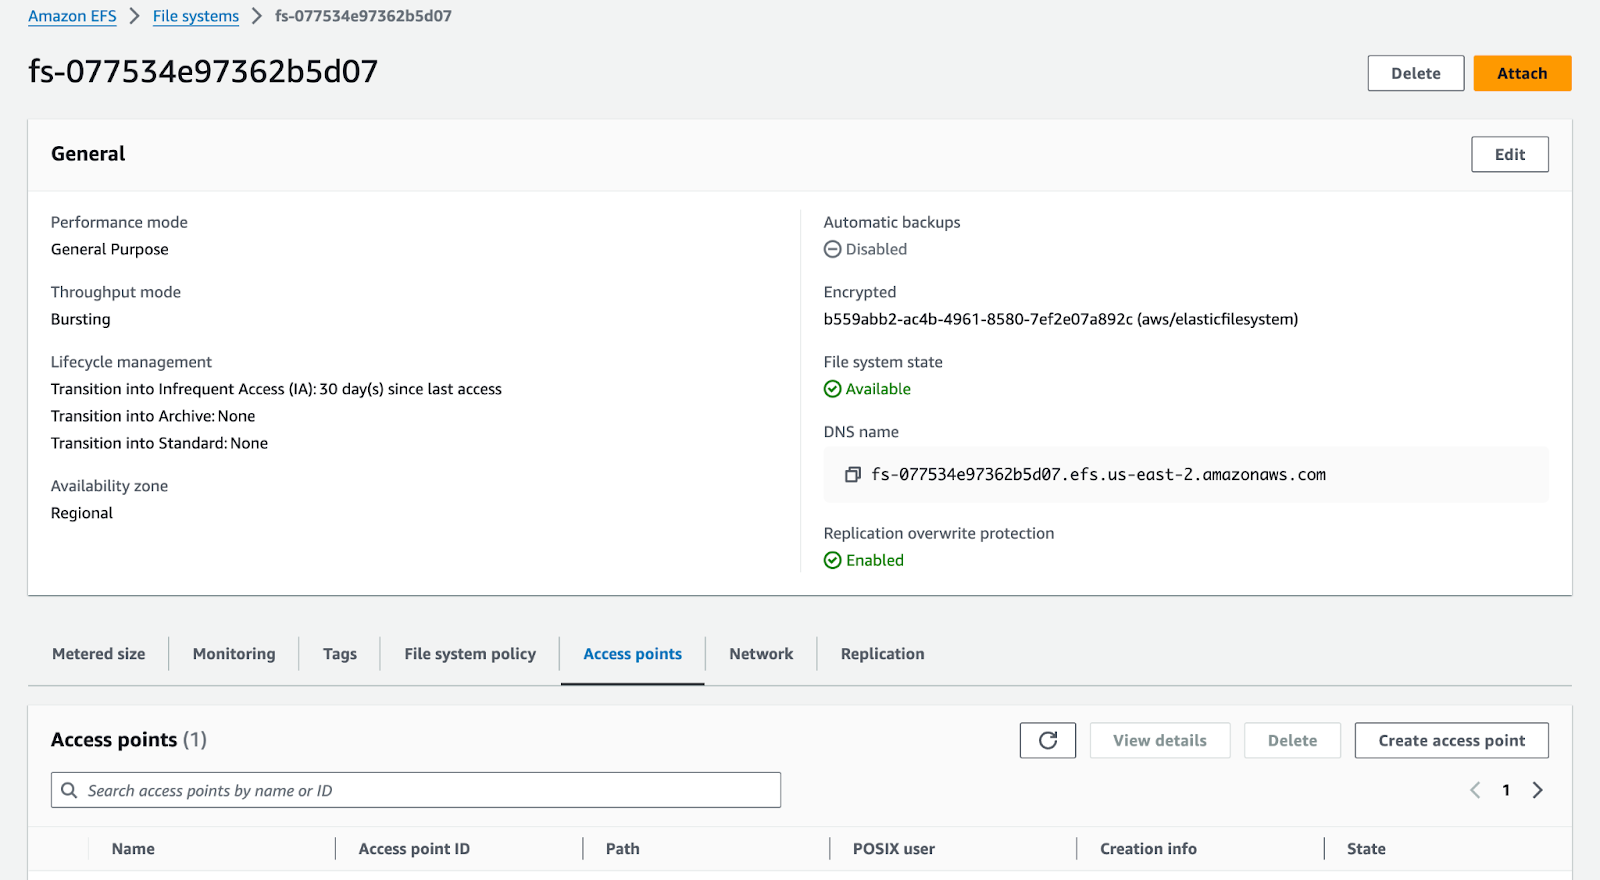
- Select the filesystem ID of the newly created filesystem and open the access points tab.
-
Create a new access point with the following settings:
a. Under Details, set Root directory path to /process.
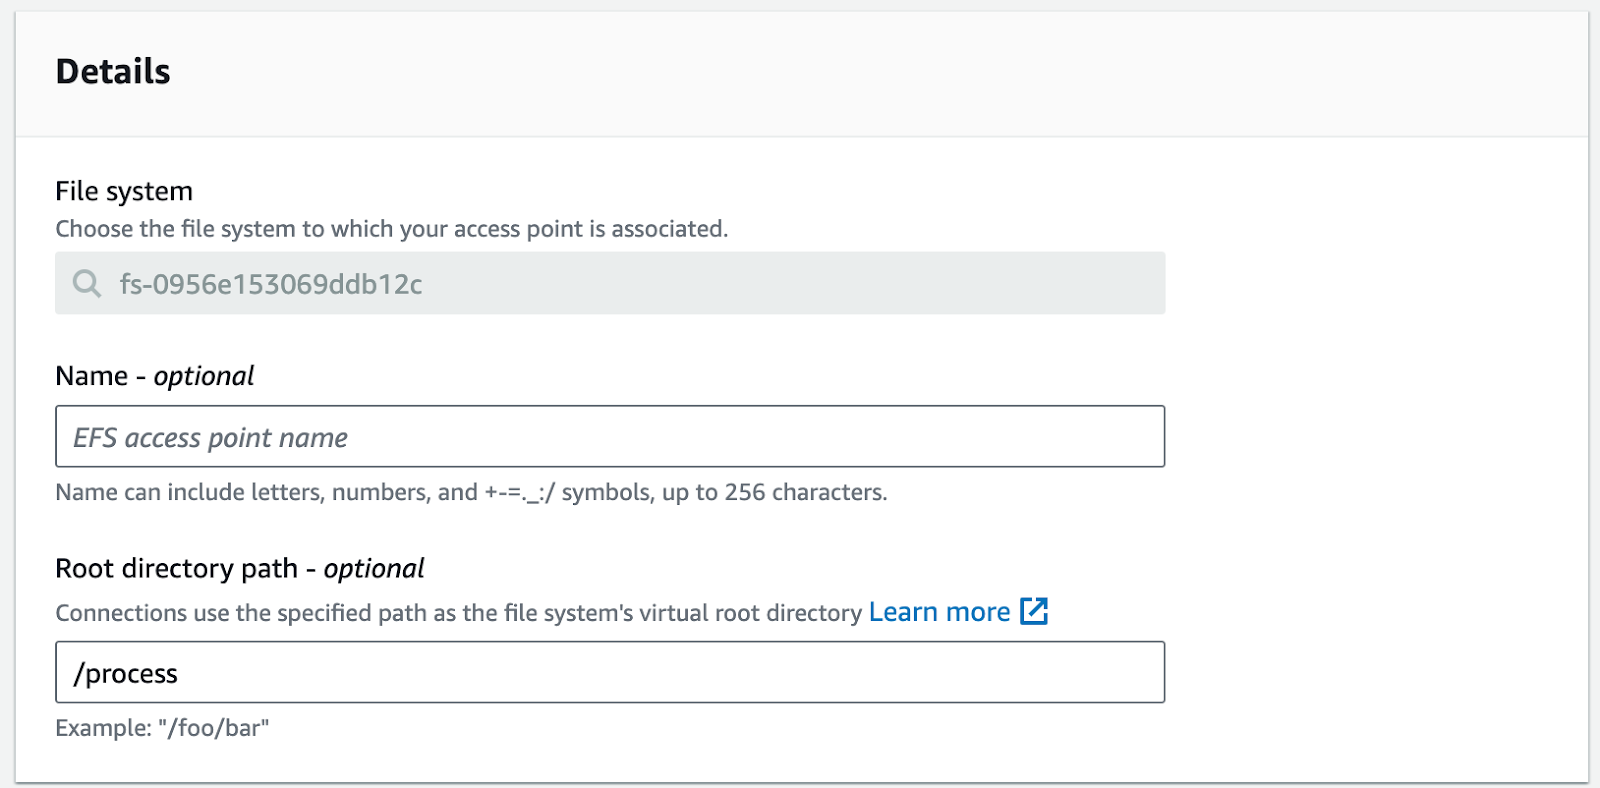
b. Under POSIX user:
i. Set User ID to0.
ii. Set Group ID to0.
c. Under Root directory creation permissions:
i. Set Owner user ID to0.
ii. Set Owner group ID to0.
iii. Set Access point permissions to0755.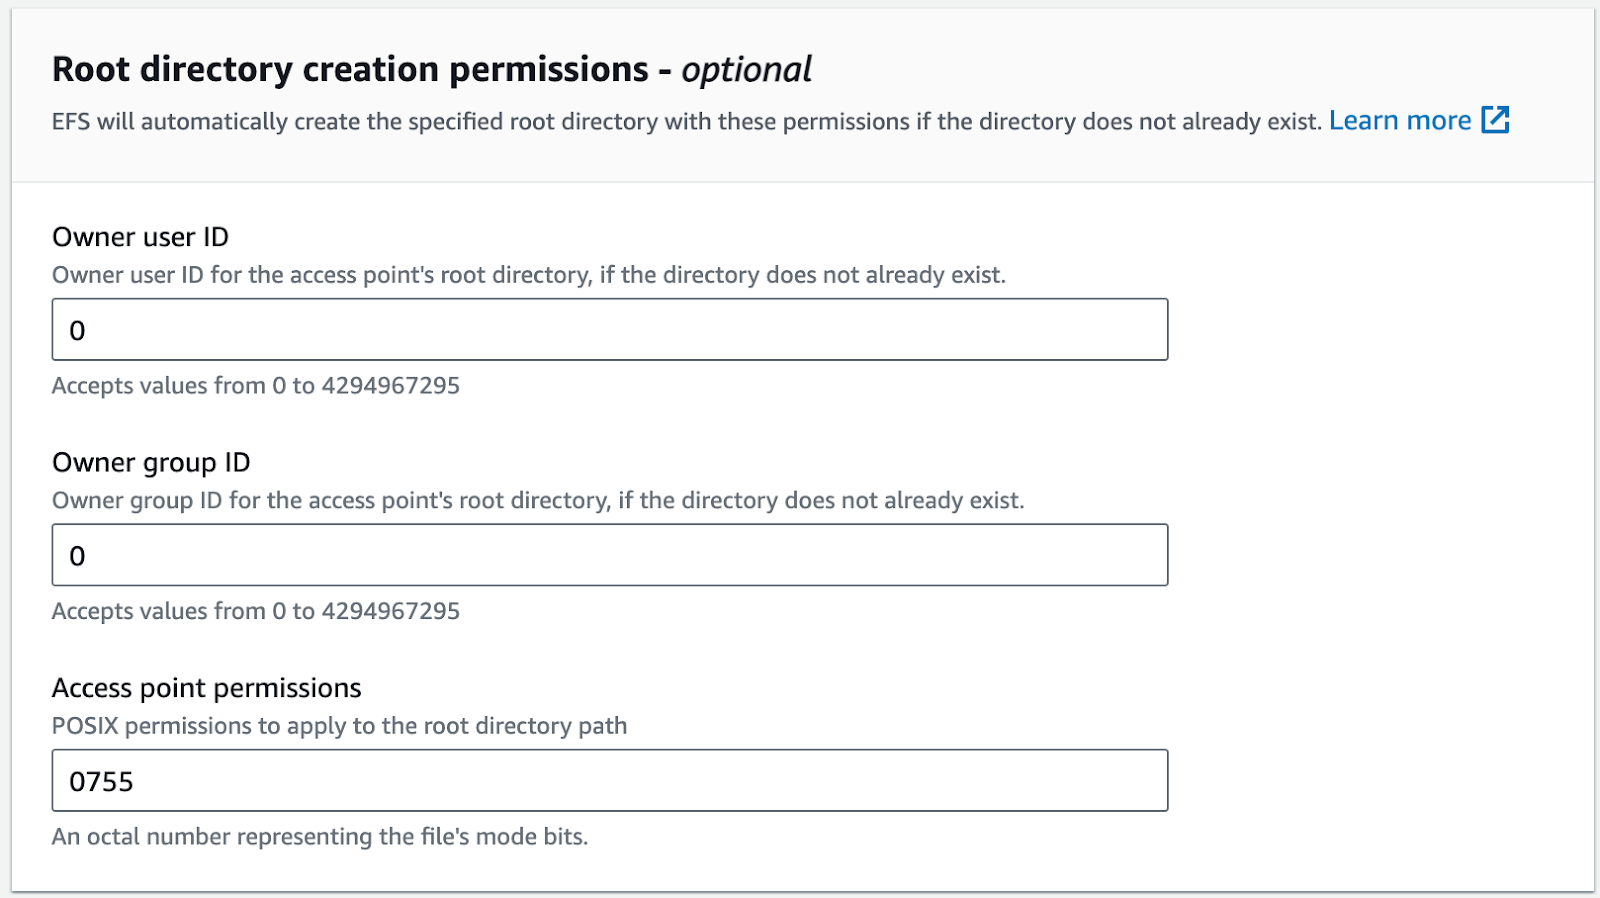
-
Click Create
-
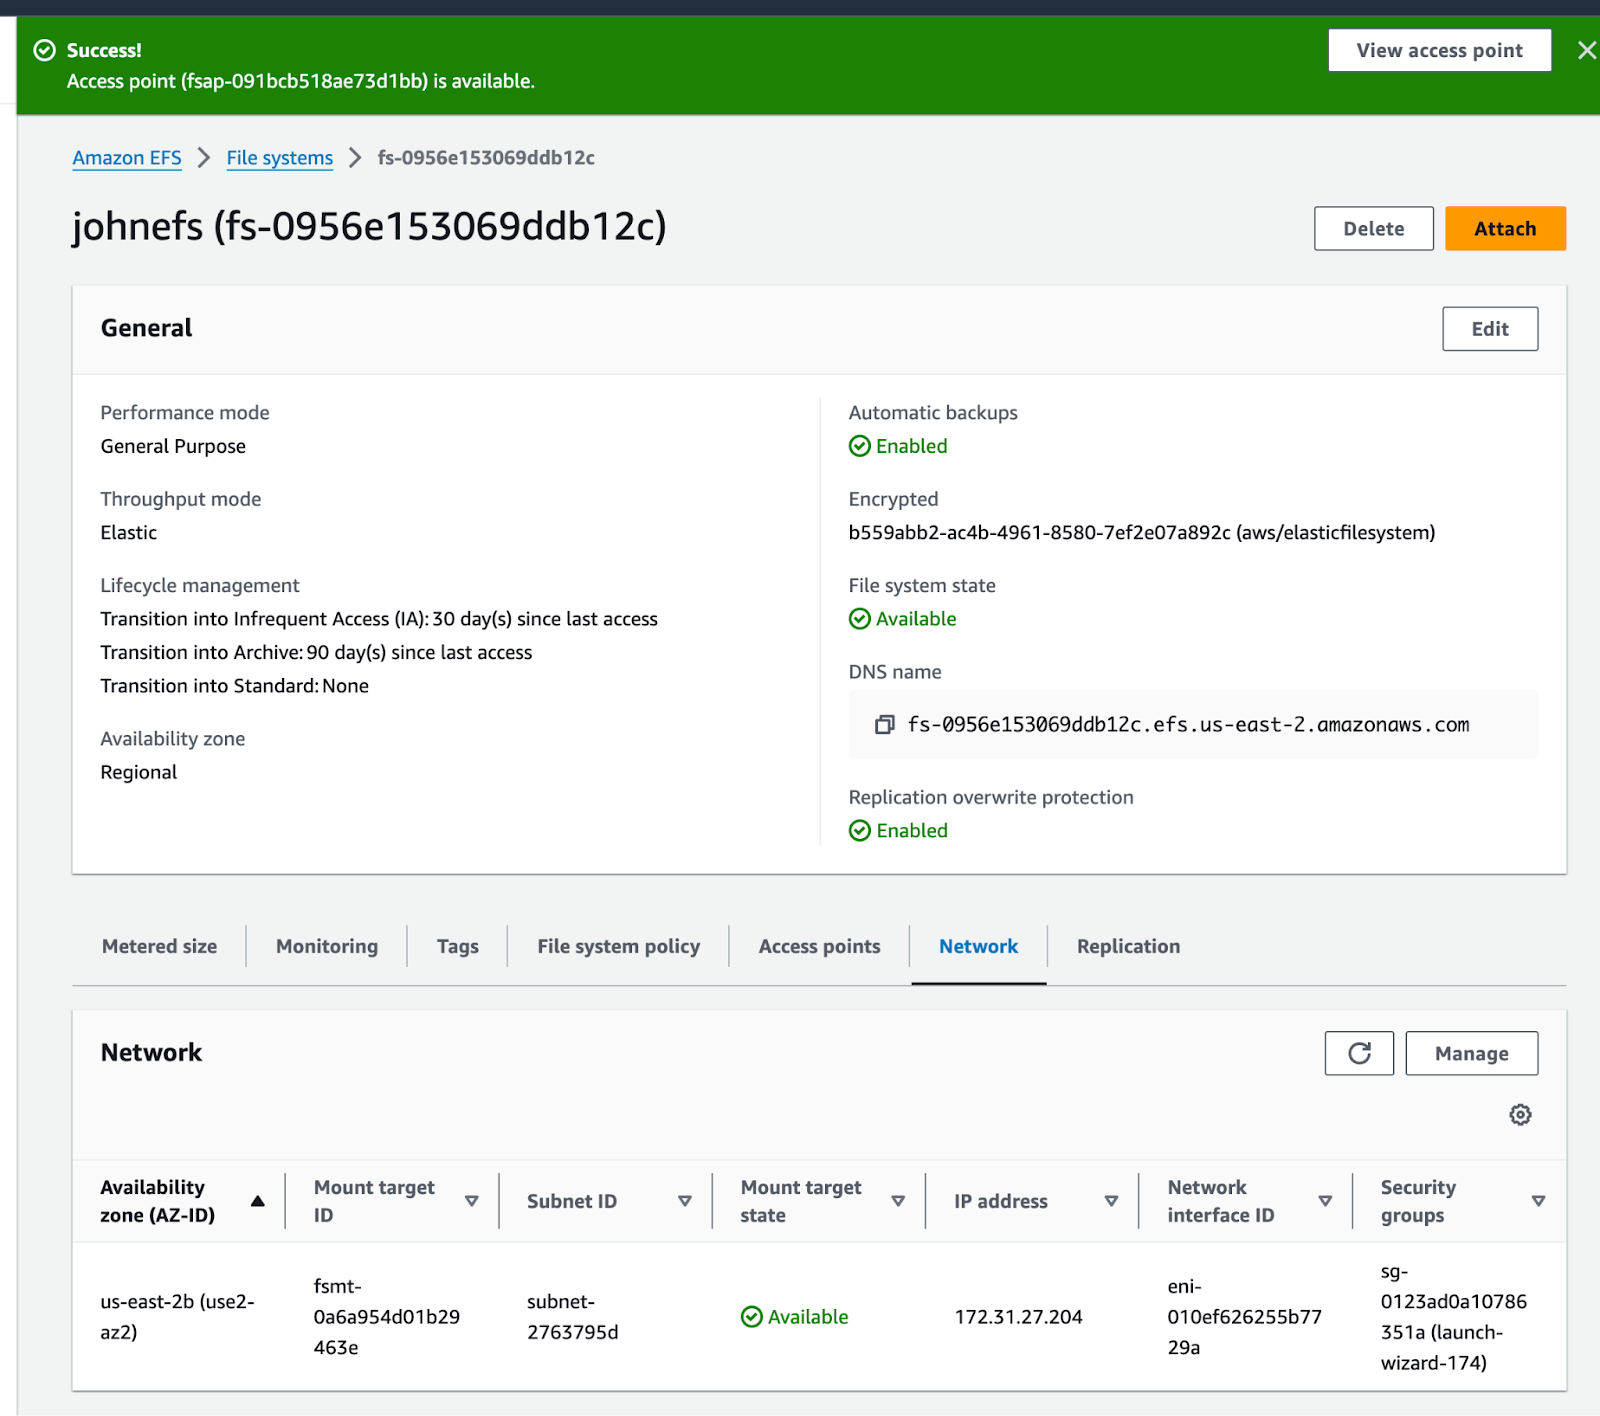
For the file system go to the Network tab and make a note of the ip address for the availability zone your VM is in
- Once the access point and mount target have finished creation, Mount in the UI (Settings > Advanced > NFS > Setup NFS) using the ip address of the mount target: