How to Import AWS EC2 and EBS Data into Cado
/ Forensic Acquisition and Investigation supports acquiring data from EC2 instances.
Start by selecting the region, which will populate a list of available EC2 instances. You can filter this list by instance ID, name, state, or public IP address. Once you’ve found the instance you want to acquire, select it:
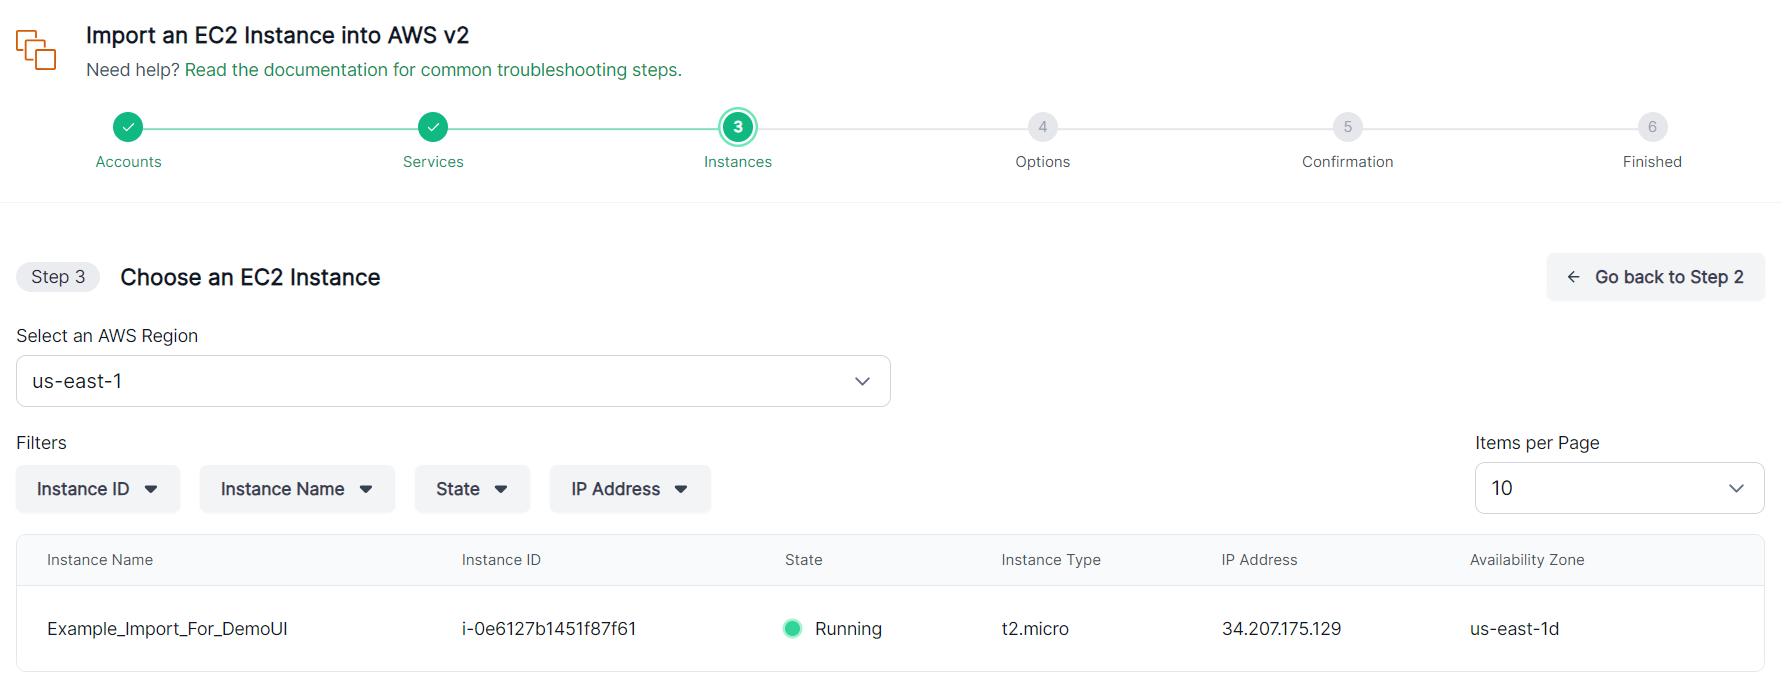
Click Continue to proceed.
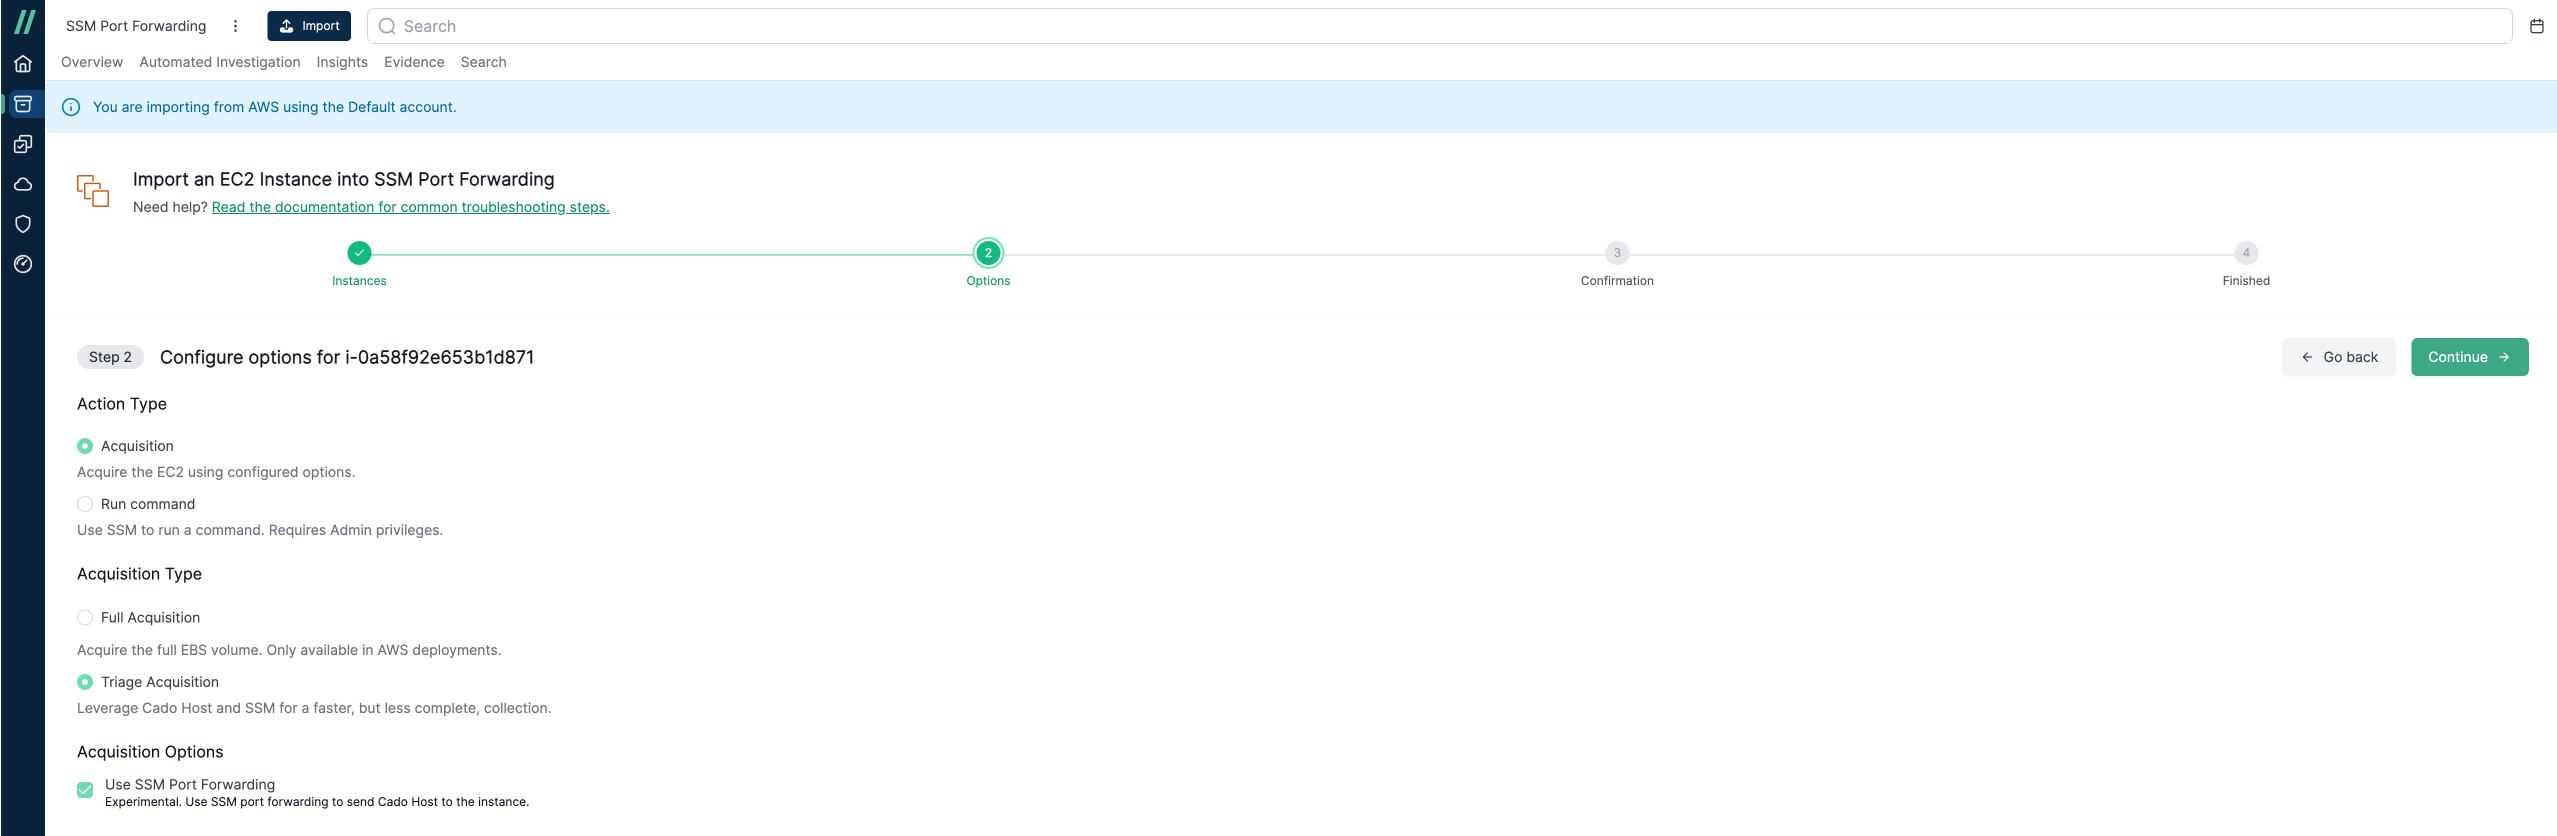
Capture Options
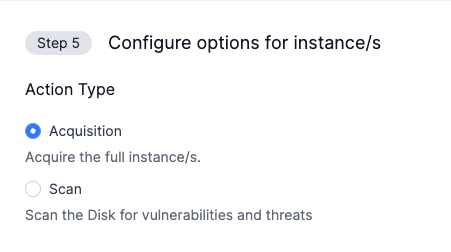
Acquisition vs Run Command
You can acquire data (below), or use the Run Command feature to execute scripts on the target system.
Full Volume/Disk Capture
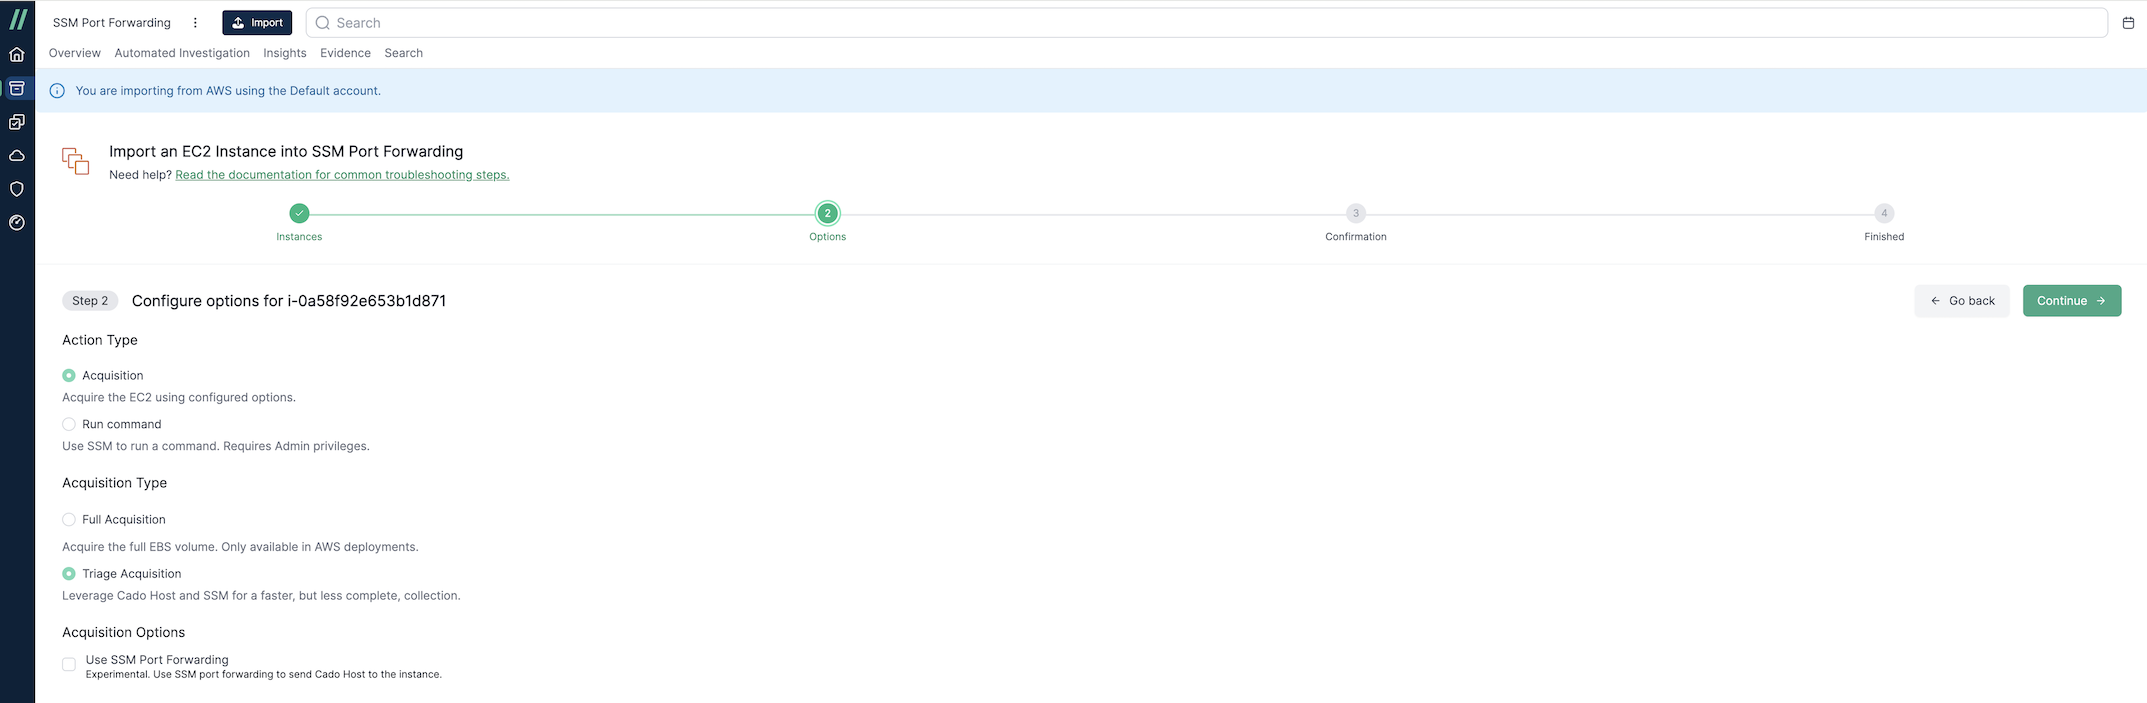
To acquire the full EBS volume, select Full Acquisition under Acquisition Type. This will be performed using either the EBS Direct Acquisition or EBS Create Volume Acquisition method depending on your settings.
Triage Capture
For a faster triage collection on an EC2 instance, use Triage Acquisition via / Forensic Acquisition and Investigation Host. This requires that AWS Systems Manager (SSM) be enabled on the target instance and also supports memory collection on Linux systems.
Scan Only
For a view of any threats and vulnerabilities that exists on the resource. it skip some processing tasks.
For more details about what / Forensic Acquisition and Investigation Host collects, refer to the Collected Artifacts Documentation.
Flow Diagram for EC2 SSM Acquisition:
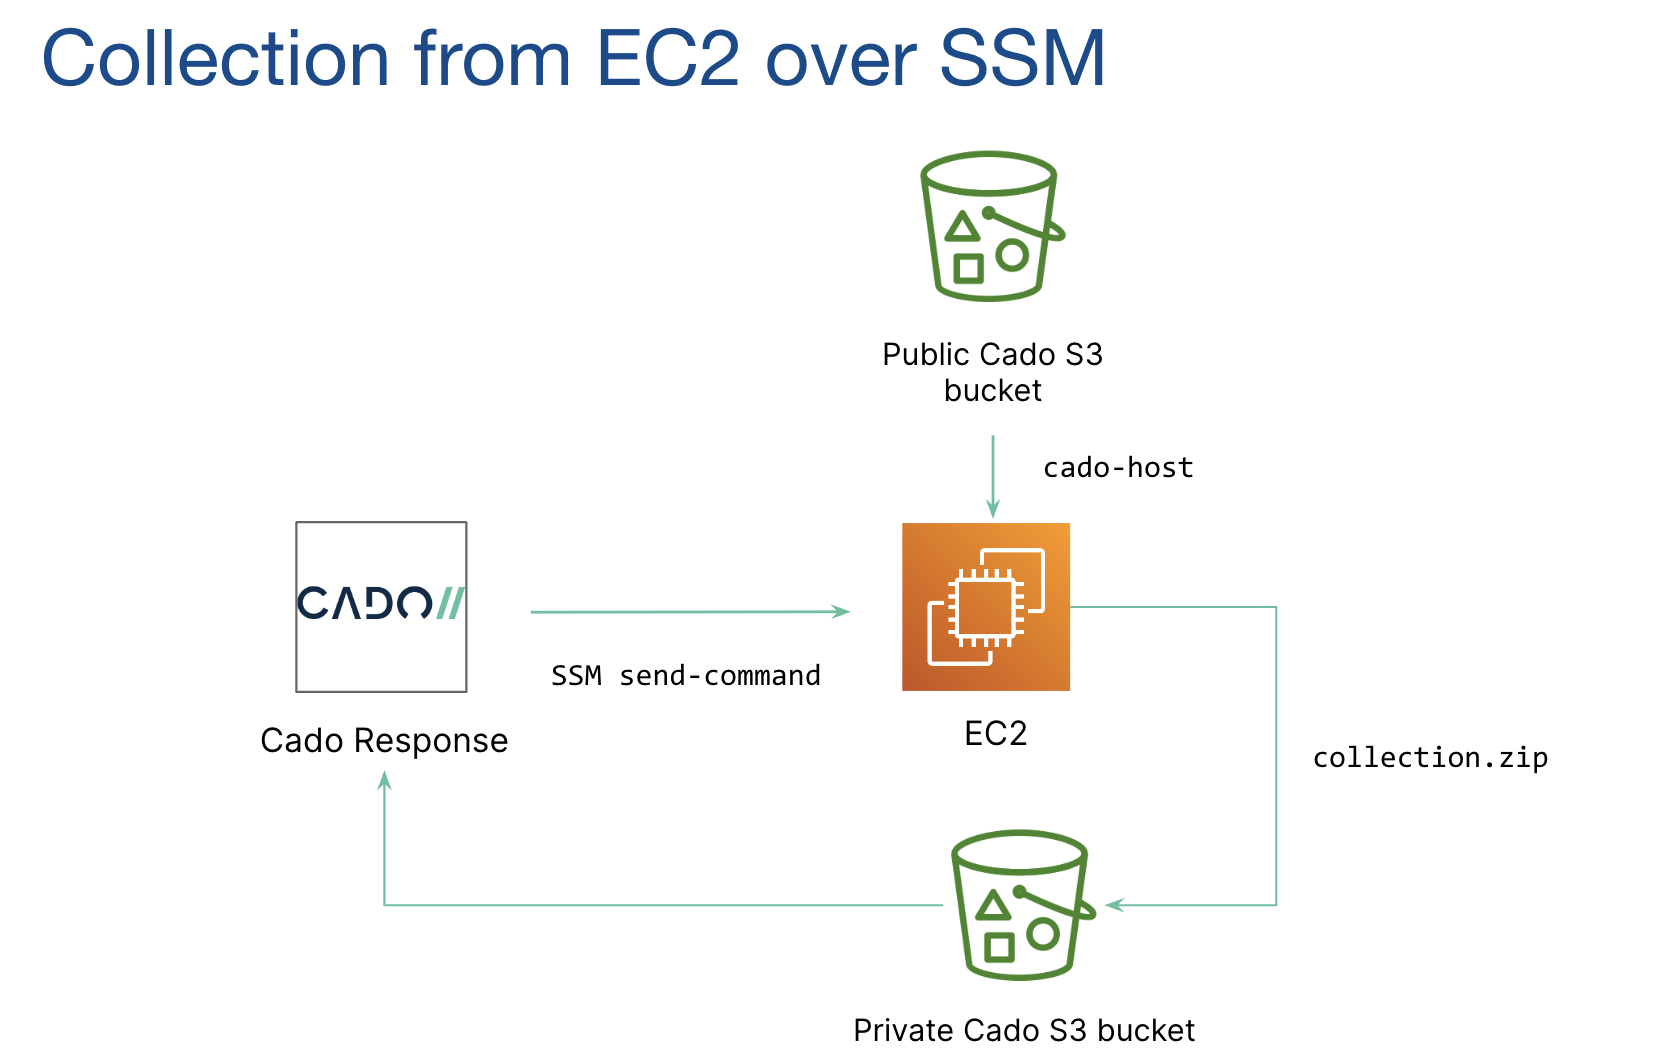
Click Continue, review your selections, and click Start Import.
Triage Capture with SSM Port Forwarding (Linux Only)
When using Triage Acquisition for a Linux EC2 instance, you can enable the SSM Port Forwarding option. This is useful for instances with restricted network access, where downloading the / Forensic Acquisition and Investigation Host binary directly is not possible. The SSM Port Forwarding feature transfers the binary to the instance and retrieves the triage capture. To support transferring of files over the SSM port forwarding, we require Python 3.8+ to be installed on the instance.
Flow Diagram for EC2 Tunnel Acquisition:
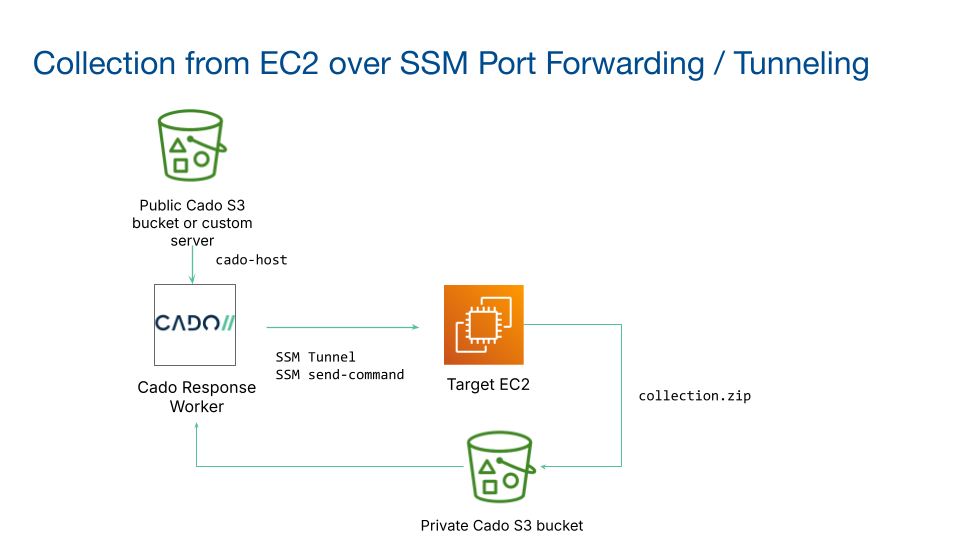
The Triage Acquisition with SSM Port Forwarding option utilizes the / Forensic Acquisition and Investigation Run Command feature to execute the / Forensic Acquisition and Investigation Host binary on the target system - for more details on how this works, refer to the Run Command documentation.
Skip Processing
The / Forensic Acquisition and Investigation platform supports the option to skip processing of the EBS volume. Select Skip Processing under Processing Options to activate this option. If you decide you want to process the volume at a later date, this can be achieved by selecting Process Evidence on the relevant evidence item in the Evidence tab.